> ## Documentation Index
> Fetch the complete documentation index at: https://docs.shaktistudio.ai/llms.txt
> Use this file to discover all available pages before exploring further.
# Adding a Custom Model
> Prepare and add a custom model or custom pipeline to the platform using the standard model interface and runtime configuration.
For **custom models or custom pipelines**, you must **prepare the model configuration before adding the model to the platform**. This includes defining the model logic, dependencies, and runtime environment. The platform expects all required files to be packaged together and provided as a single artifact.
This page describes how to implement the model interface, define runtime configuration, package your model, and add it through the UI.
## Model interface (`model.py`)
Your custom model must implement a standard interface so the platform can load and run it correctly.
**Method requirements:**
* **`load()`** – Handles model initialization and weight loading
* **`preprocess()`** – Optional input preprocessing
* **`predict()`** – Core inference logic
* **`postprocess()`** – Optional output formatting
Example:
```python theme={null}
class Model:
def __init__(self):
self.model_ = None
def load(self):
# Initialize or load model weights
self.model_ = "Model Initialization"
def preprocess(self, request):
"""
Preprocess the incoming request.
Input can be a Pydantic BaseModel, dict, or string.
"""
return request
def predict(self, request):
# Run inference
output = self.model_.predict()
return output
def postprocess(self, request):
# Postprocess the model output
return request
```
## Runtime configuration (`config.yaml`)
The `config.yaml` file defines the execution environment for the custom model.
**Key sections:**
* **`python_version`** – Python runtime version
* **`environment_variables`** – Custom environment variables (if any)
* **`requirements`** – Python dependencies
* **`system_packages`** – OS-level packages
* **`custom_setup_script`** – Optional setup script executed during build
Example:
```yaml theme={null}
python_version: "3.10"
environment_variables: {}
requirements:
- accelerate==0.20.3
- bitsandbytes==0.39.1
- peft==0.3.0
- protobuf==4.23.3
- sentencepiece==0.1.99
- torch==2.0.1
- transformers==4.30.2
system_packages:
- wget
- curl
custom_setup_script: "script.sh"
```
## Packaging the custom model
Before adding the model to the platform, package all required files into a single artifact.
Place the following in one folder:
* `model.py`
* `config.yaml`
* Any additional scripts or assets (e.g. `script.sh`)
Create a **ZIP file** containing the directory contents.
Upload the ZIP to one of the supported model sources:
* **AWS S3**
* **GCP GCS**
* **Public URL**
Upload your trained model to **AWS S3** or **GCP GCS**, share the access credentials, and the platform will compile and prepare it for deployment. Models built to your specifications are integrated into the platform.
## Adding the custom model to the platform
When adding the model in the UI, select the appropriate **Model Source**, set the **Model Path** to the location of the ZIP file, and choose **Custom Pipeline / Custom Model** as the model type. The platform unpacks the archive, sets up the environment, and loads the model using your configuration.
Navigate to [**My Models**](https://shaktistudio.ai/my-models) and click **Add a Model** (top-right).
* Provide a **Model Name**.
* Select **Model Source**: **Hugging Face** or **AWS/GCP bucket** (use the source where you uploaded the ZIP).
* Enter the **Model Path** (e.g. S3 URI, GCS URI, or public URL to the ZIP).
* Select the linked **[Cloud Credentials](integrations/secrets)** if required.
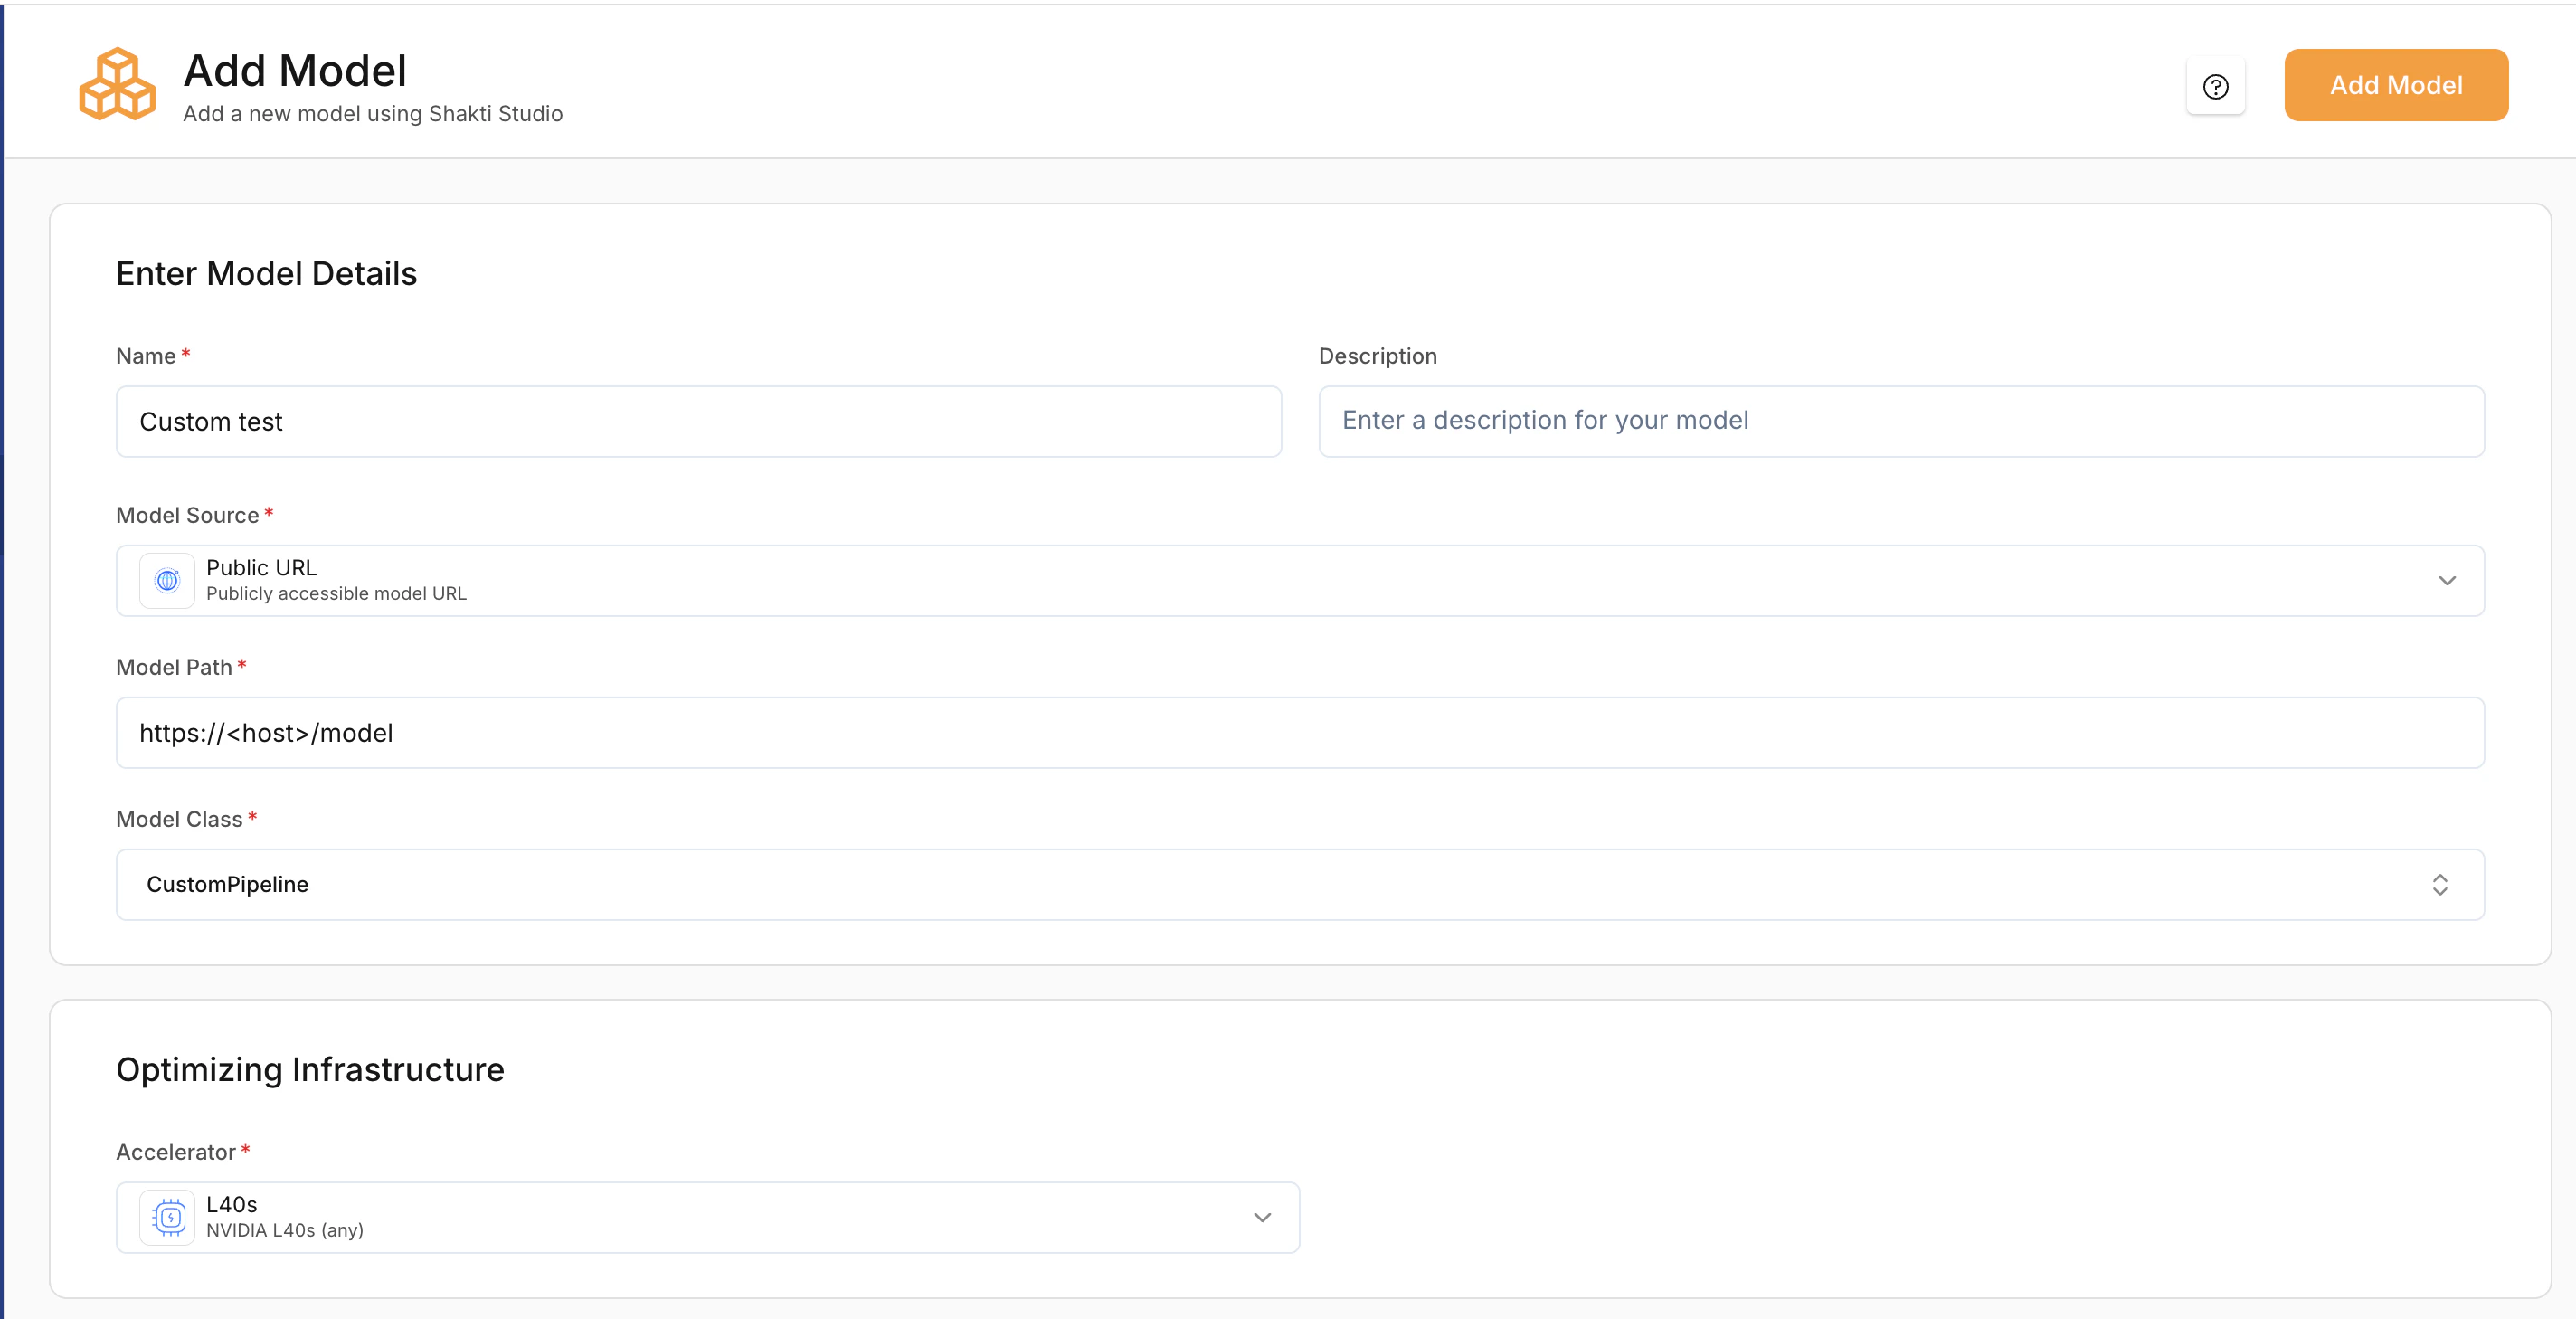 Under **Model Class**, choose **Custom Pipeline** (or **Custom Model**).
* Select a **Accelerator type** based on your model’s size and compute requirements.
Click **Add Model** to start compilation. The platform will unpack the archive, set up the environment, and load the model.
### LoRA Configuration (Optional)
LoRA (Low-Rank Adaptation) allows loading fine-tuned adapters on top of base models.
* **Enable LoRA** – Toggle to enable or disable LoRA.
* **LoRA Config Method:**
* **Via LoRA List** – Use pre-registered LoRA adapters
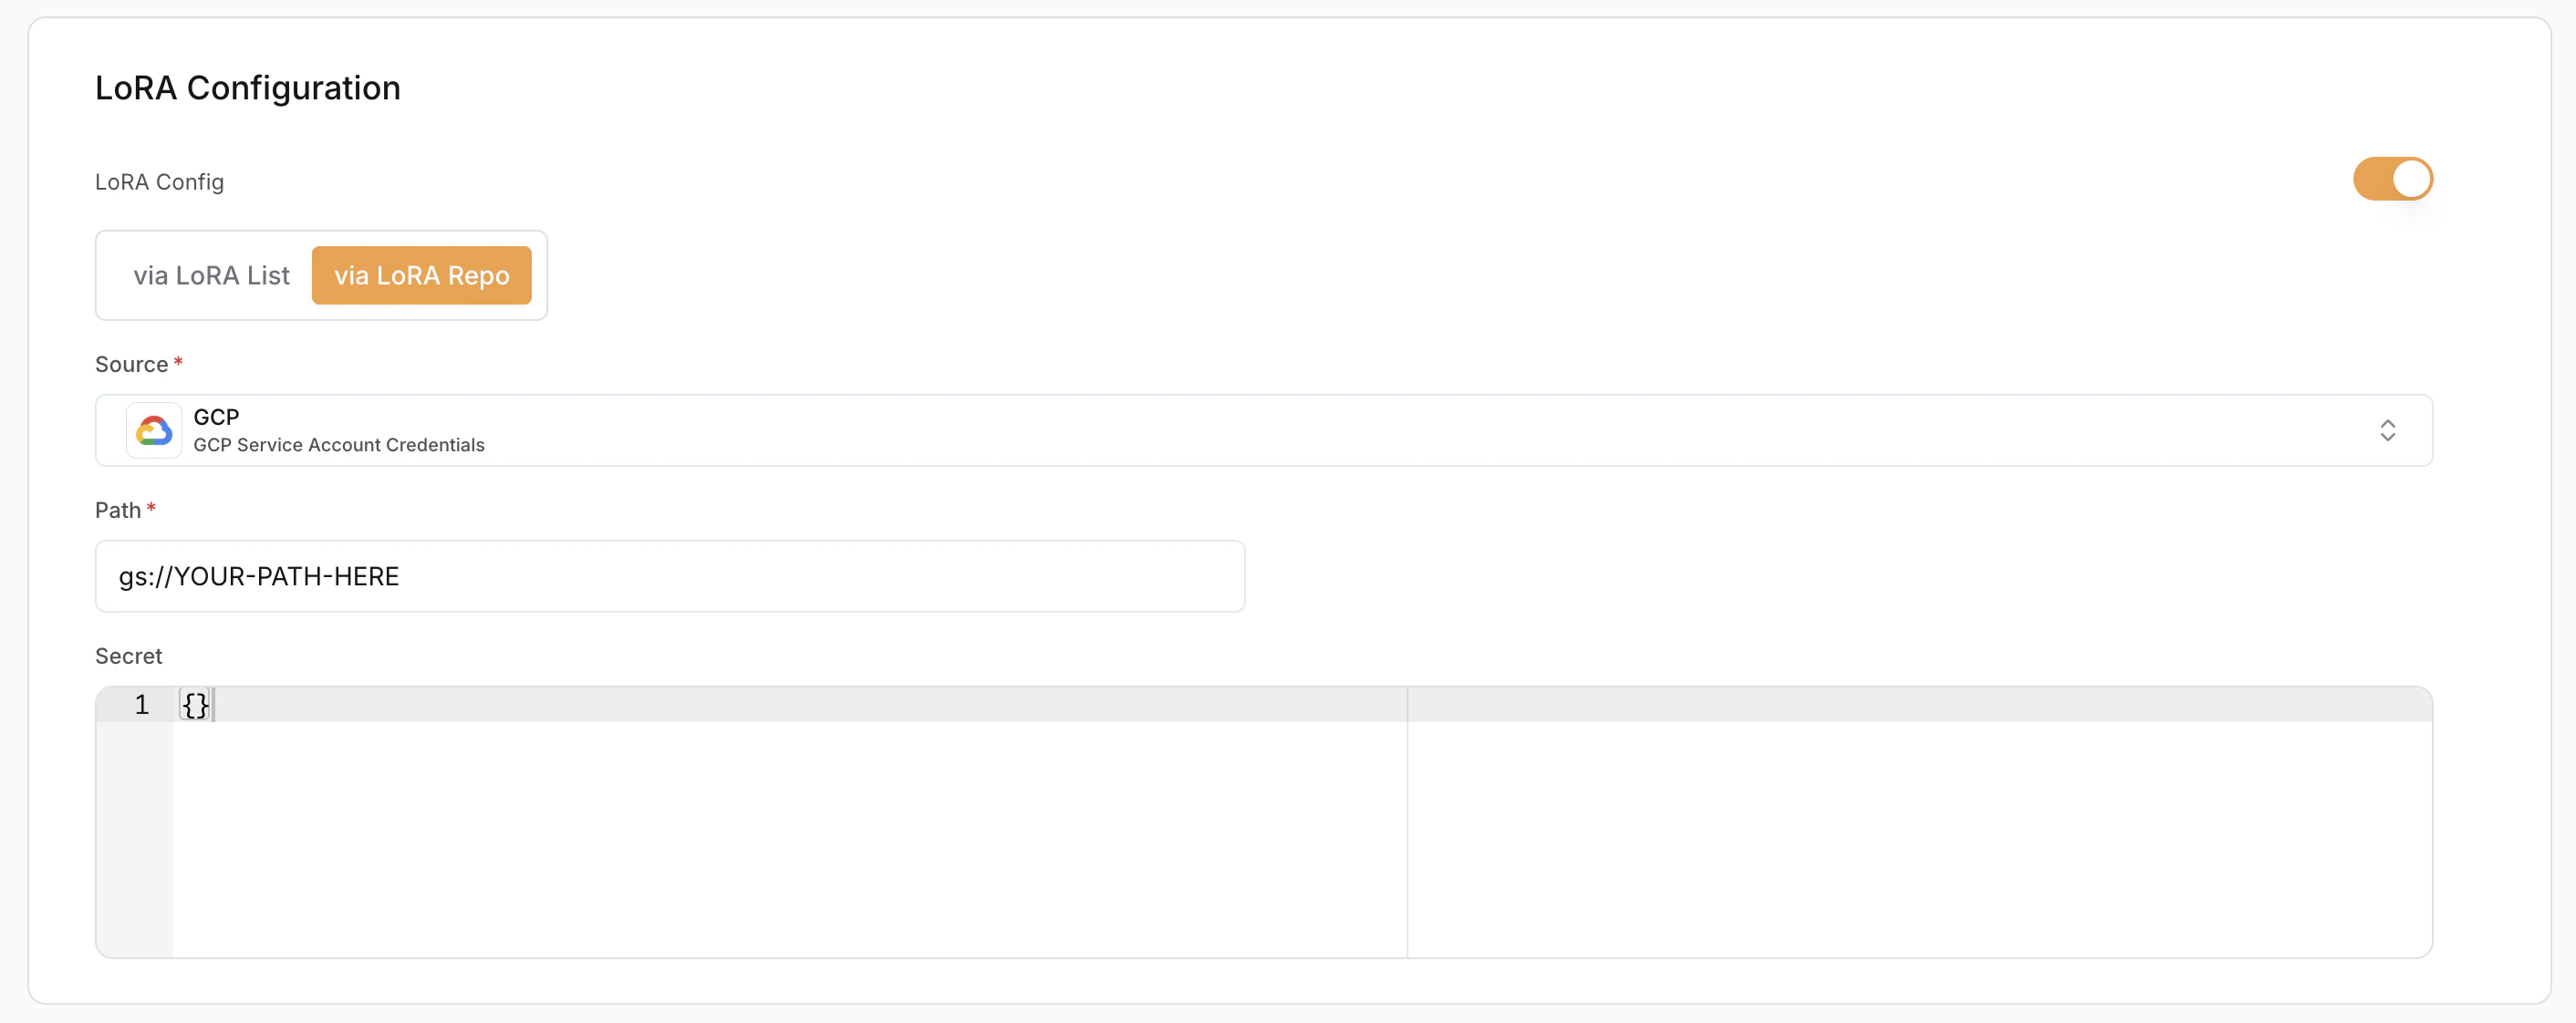
* **Via LoRA Repo** – Load directly from a repository
Use **Add LoRA Path** to attach multiple adapters if needed.
Under **Model Class**, choose **Custom Pipeline** (or **Custom Model**).
* Select a **Accelerator type** based on your model’s size and compute requirements.
Click **Add Model** to start compilation. The platform will unpack the archive, set up the environment, and load the model.
### LoRA Configuration (Optional)
LoRA (Low-Rank Adaptation) allows loading fine-tuned adapters on top of base models.
* **Enable LoRA** – Toggle to enable or disable LoRA.
* **LoRA Config Method:**
* **Via LoRA List** – Use pre-registered LoRA adapters
* **Via LoRA Repo** – Load directly from a repository
Use **Add LoRA Path** to attach multiple adapters if needed.
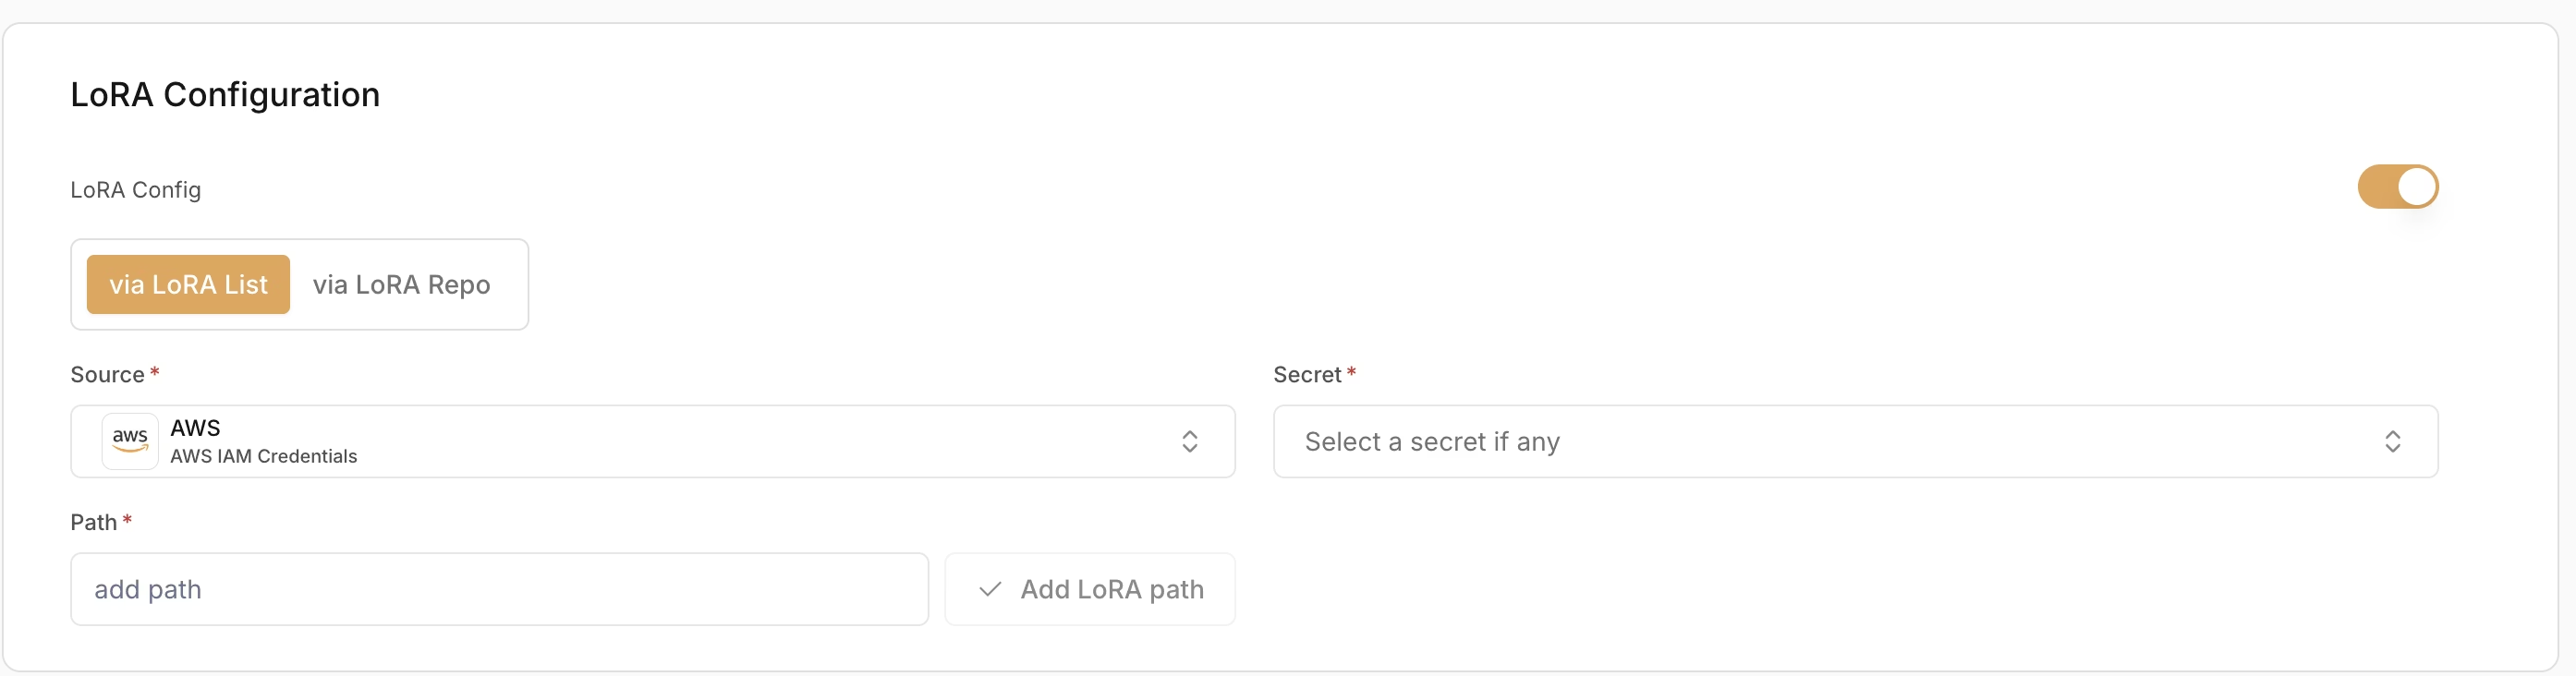 When adding a LoRA path:
* **Source (Required)** – Where the LoRA weights are stored (e.g. AWS (IAM Credentials))
* **Secret (Required)** – Credentials used to access the LoRA source
* **Path (Required)** – Path to the LoRA adapter location
When adding a LoRA path:
* **Source (Required)** – Where the LoRA weights are stored (e.g. AWS (IAM Credentials))
* **Secret (Required)** – Credentials used to access the LoRA source
* **Path (Required)** – Path to the LoRA adapter location
 ***
#### Extra Parameters
Based on your model pipeline, you can add extra parameters here in the JSON format.
***
#### Extra Parameters
Based on your model pipeline, you can add extra parameters here in the JSON format.