> ## Documentation Index
> Fetch the complete documentation index at: https://docs.shaktistudio.ai/llms.txt
> Use this file to discover all available pages before exploring further.
# Deploying a Custom Model
## **Initiate Deployment**
1. From the main menu, go to the **Deployments** tab.
Ensure your custom model has been compiled beforehand. Only compiled models will appear here.\
\
[Click here for steps to compile your custom model on Shakti Cloud.](/model-suite/adding-a-custom-model)
2. Click on the **Create** button to start a new deployment.
3. Fill in the deployment details:
* **Deployment Name**: Enter a unique name.
* **Cluster**: Select the target cluster.
* **Node Group**: Select the node group based on the GPU type and compute specs required by your model (e.g., A100, H100, T4).\
*This ensures compatibility and optimal resource allocation during deployment*
* **Model**: Select your compiled model from the list.
* **Processing Type**: Choose how you want requests to be handled:
* `Sync`
* `Async`
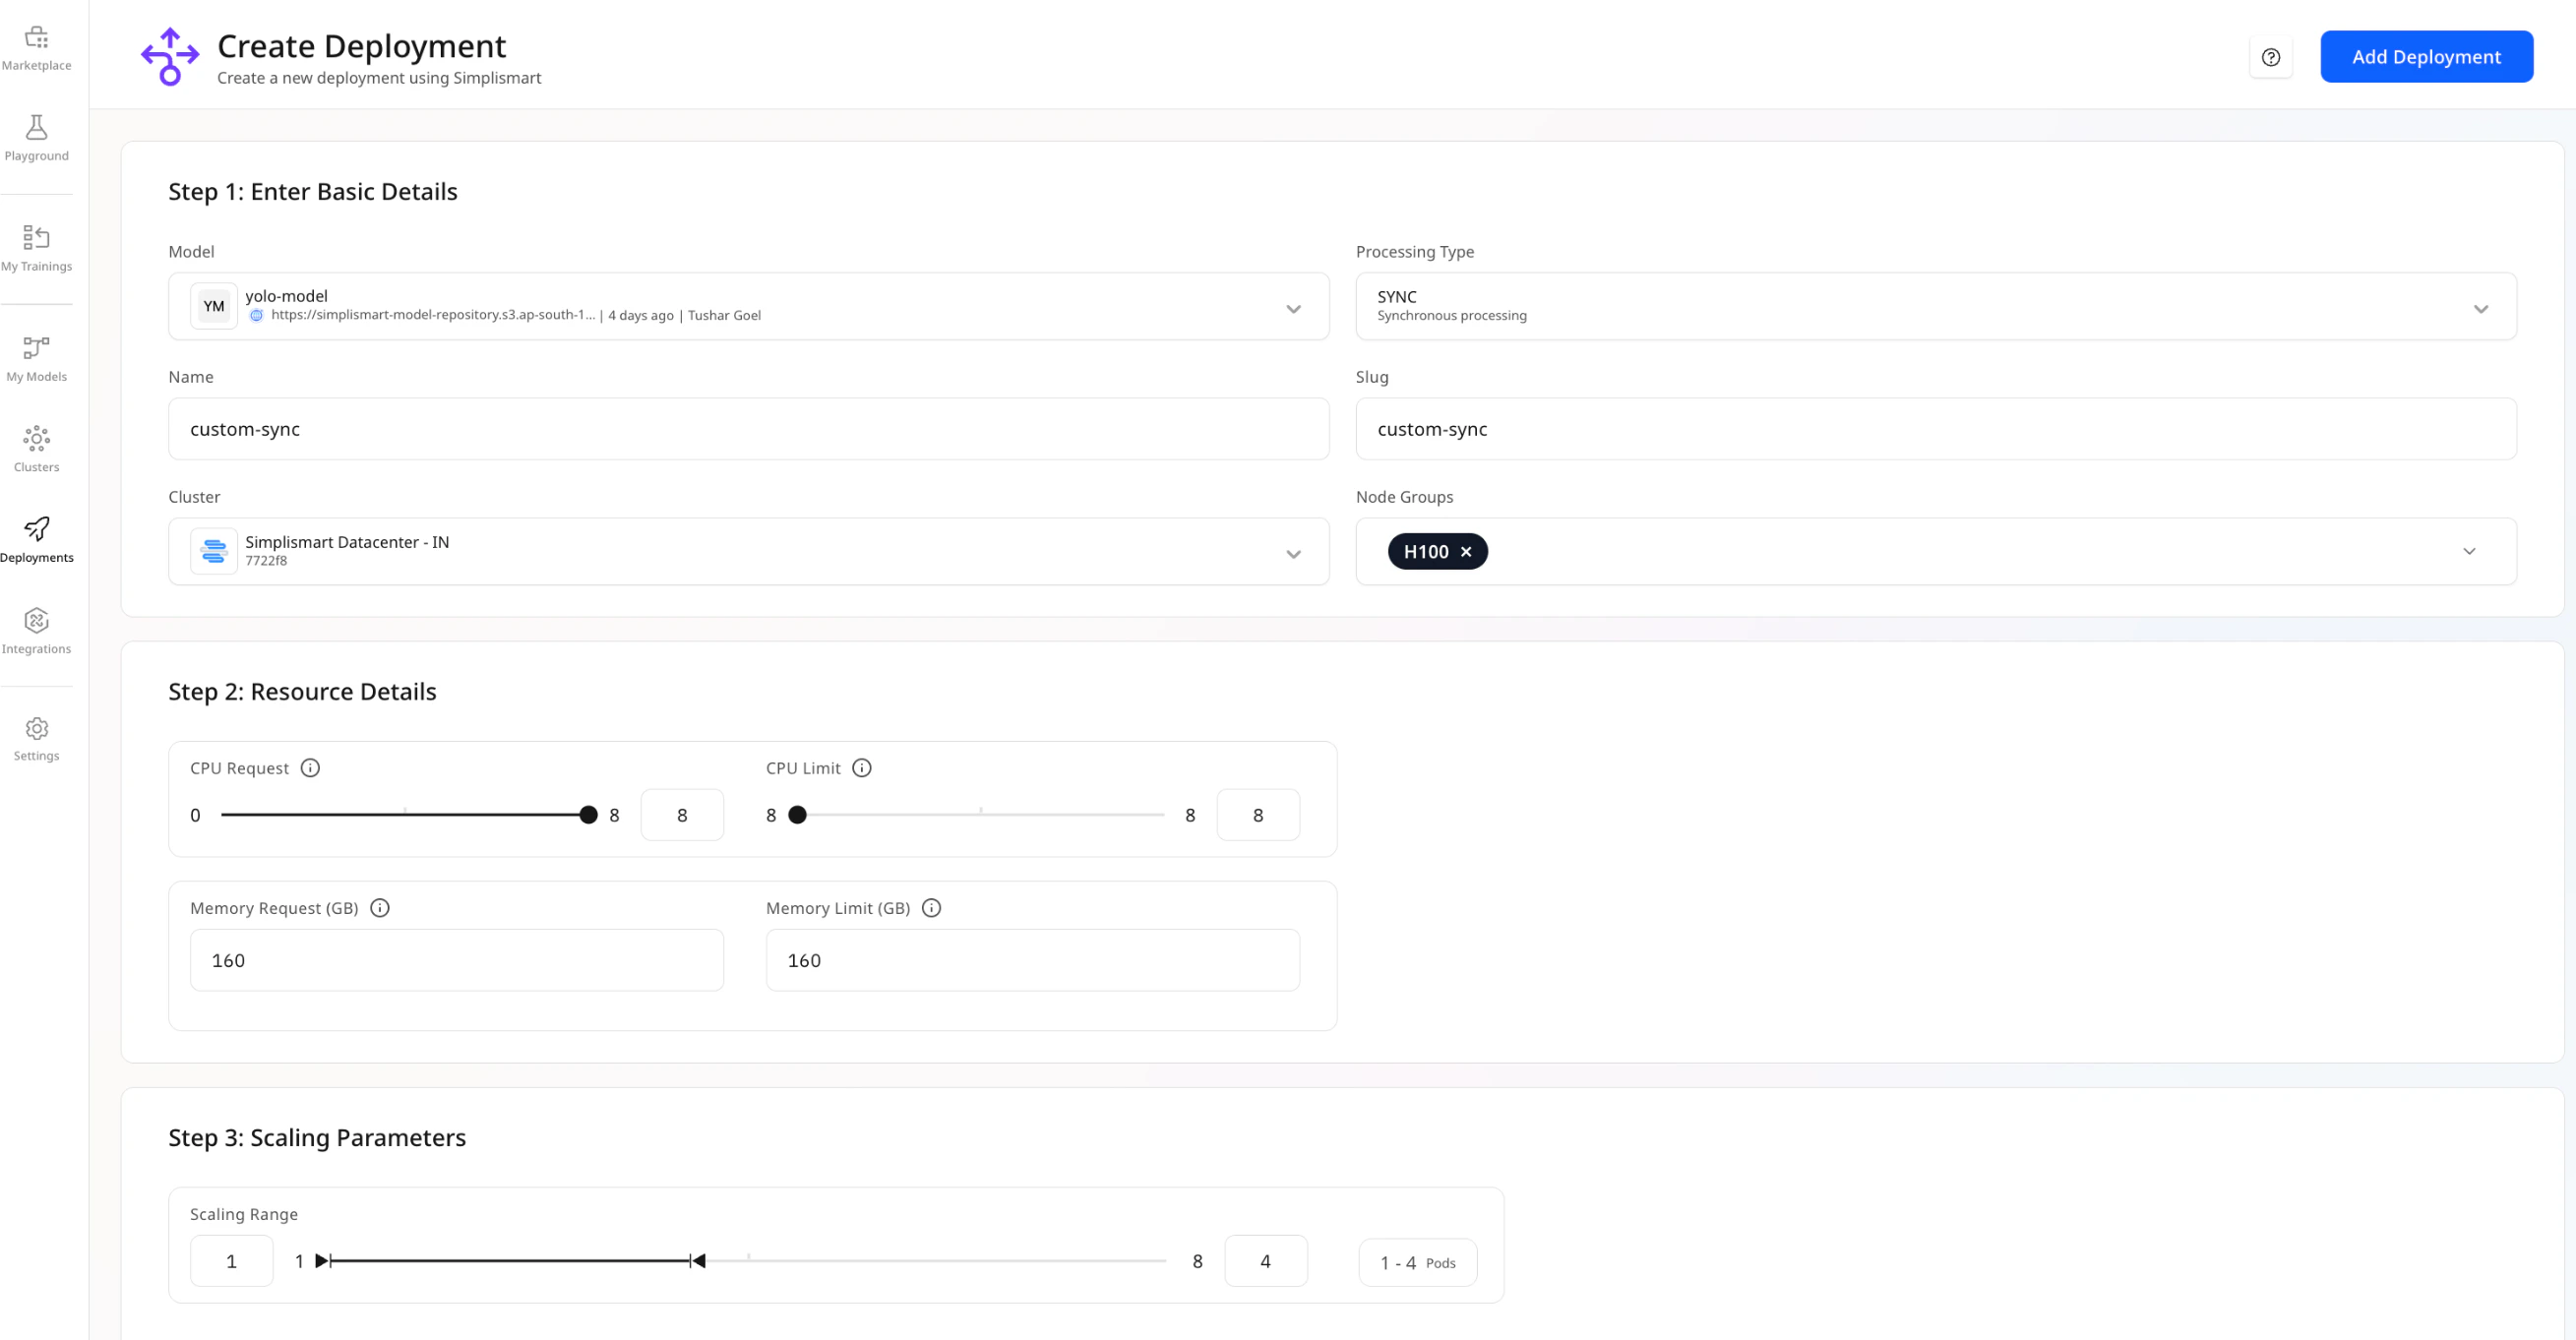 **Cluster Selection**\
\
For Private Endpoint deployments, choose **Yotta Cloud**, which offers GPU options like **H100** and **L40S**. Select based on your model's performance requirements and deployment preferences.
## **Configure Resource Requirements**
Set resource limits for your deployment:
### **CPU Request & Limit**
* **CPU Request**: Minimum guaranteed CPU for the container.
* **CPU Limit**: Maximum CPU the container can use. Throttled if exceeded.
### **Memory Request & Limit**
* **Memory Request**: Minimum guaranteed memory.
* **Memory Limit**: Maximum memory allowed. Exceeding it results in termination (OOM error).
## **Set Scaling Parameters**
1. Choose one or more metrics to scale on:
* CPU Utilization
* GPU Utilization
* Memory Usage
* GPU Memory Usage
* Latency
* Throughput
**Cluster Selection**\
\
For Private Endpoint deployments, choose **Yotta Cloud**, which offers GPU options like **H100** and **L40S**. Select based on your model's performance requirements and deployment preferences.
## **Configure Resource Requirements**
Set resource limits for your deployment:
### **CPU Request & Limit**
* **CPU Request**: Minimum guaranteed CPU for the container.
* **CPU Limit**: Maximum CPU the container can use. Throttled if exceeded.
### **Memory Request & Limit**
* **Memory Request**: Minimum guaranteed memory.
* **Memory Limit**: Maximum memory allowed. Exceeding it results in termination (OOM error).
## **Set Scaling Parameters**
1. Choose one or more metrics to scale on:
* CPU Utilization
* GPU Utilization
* Memory Usage
* GPU Memory Usage
* Latency
* Throughput
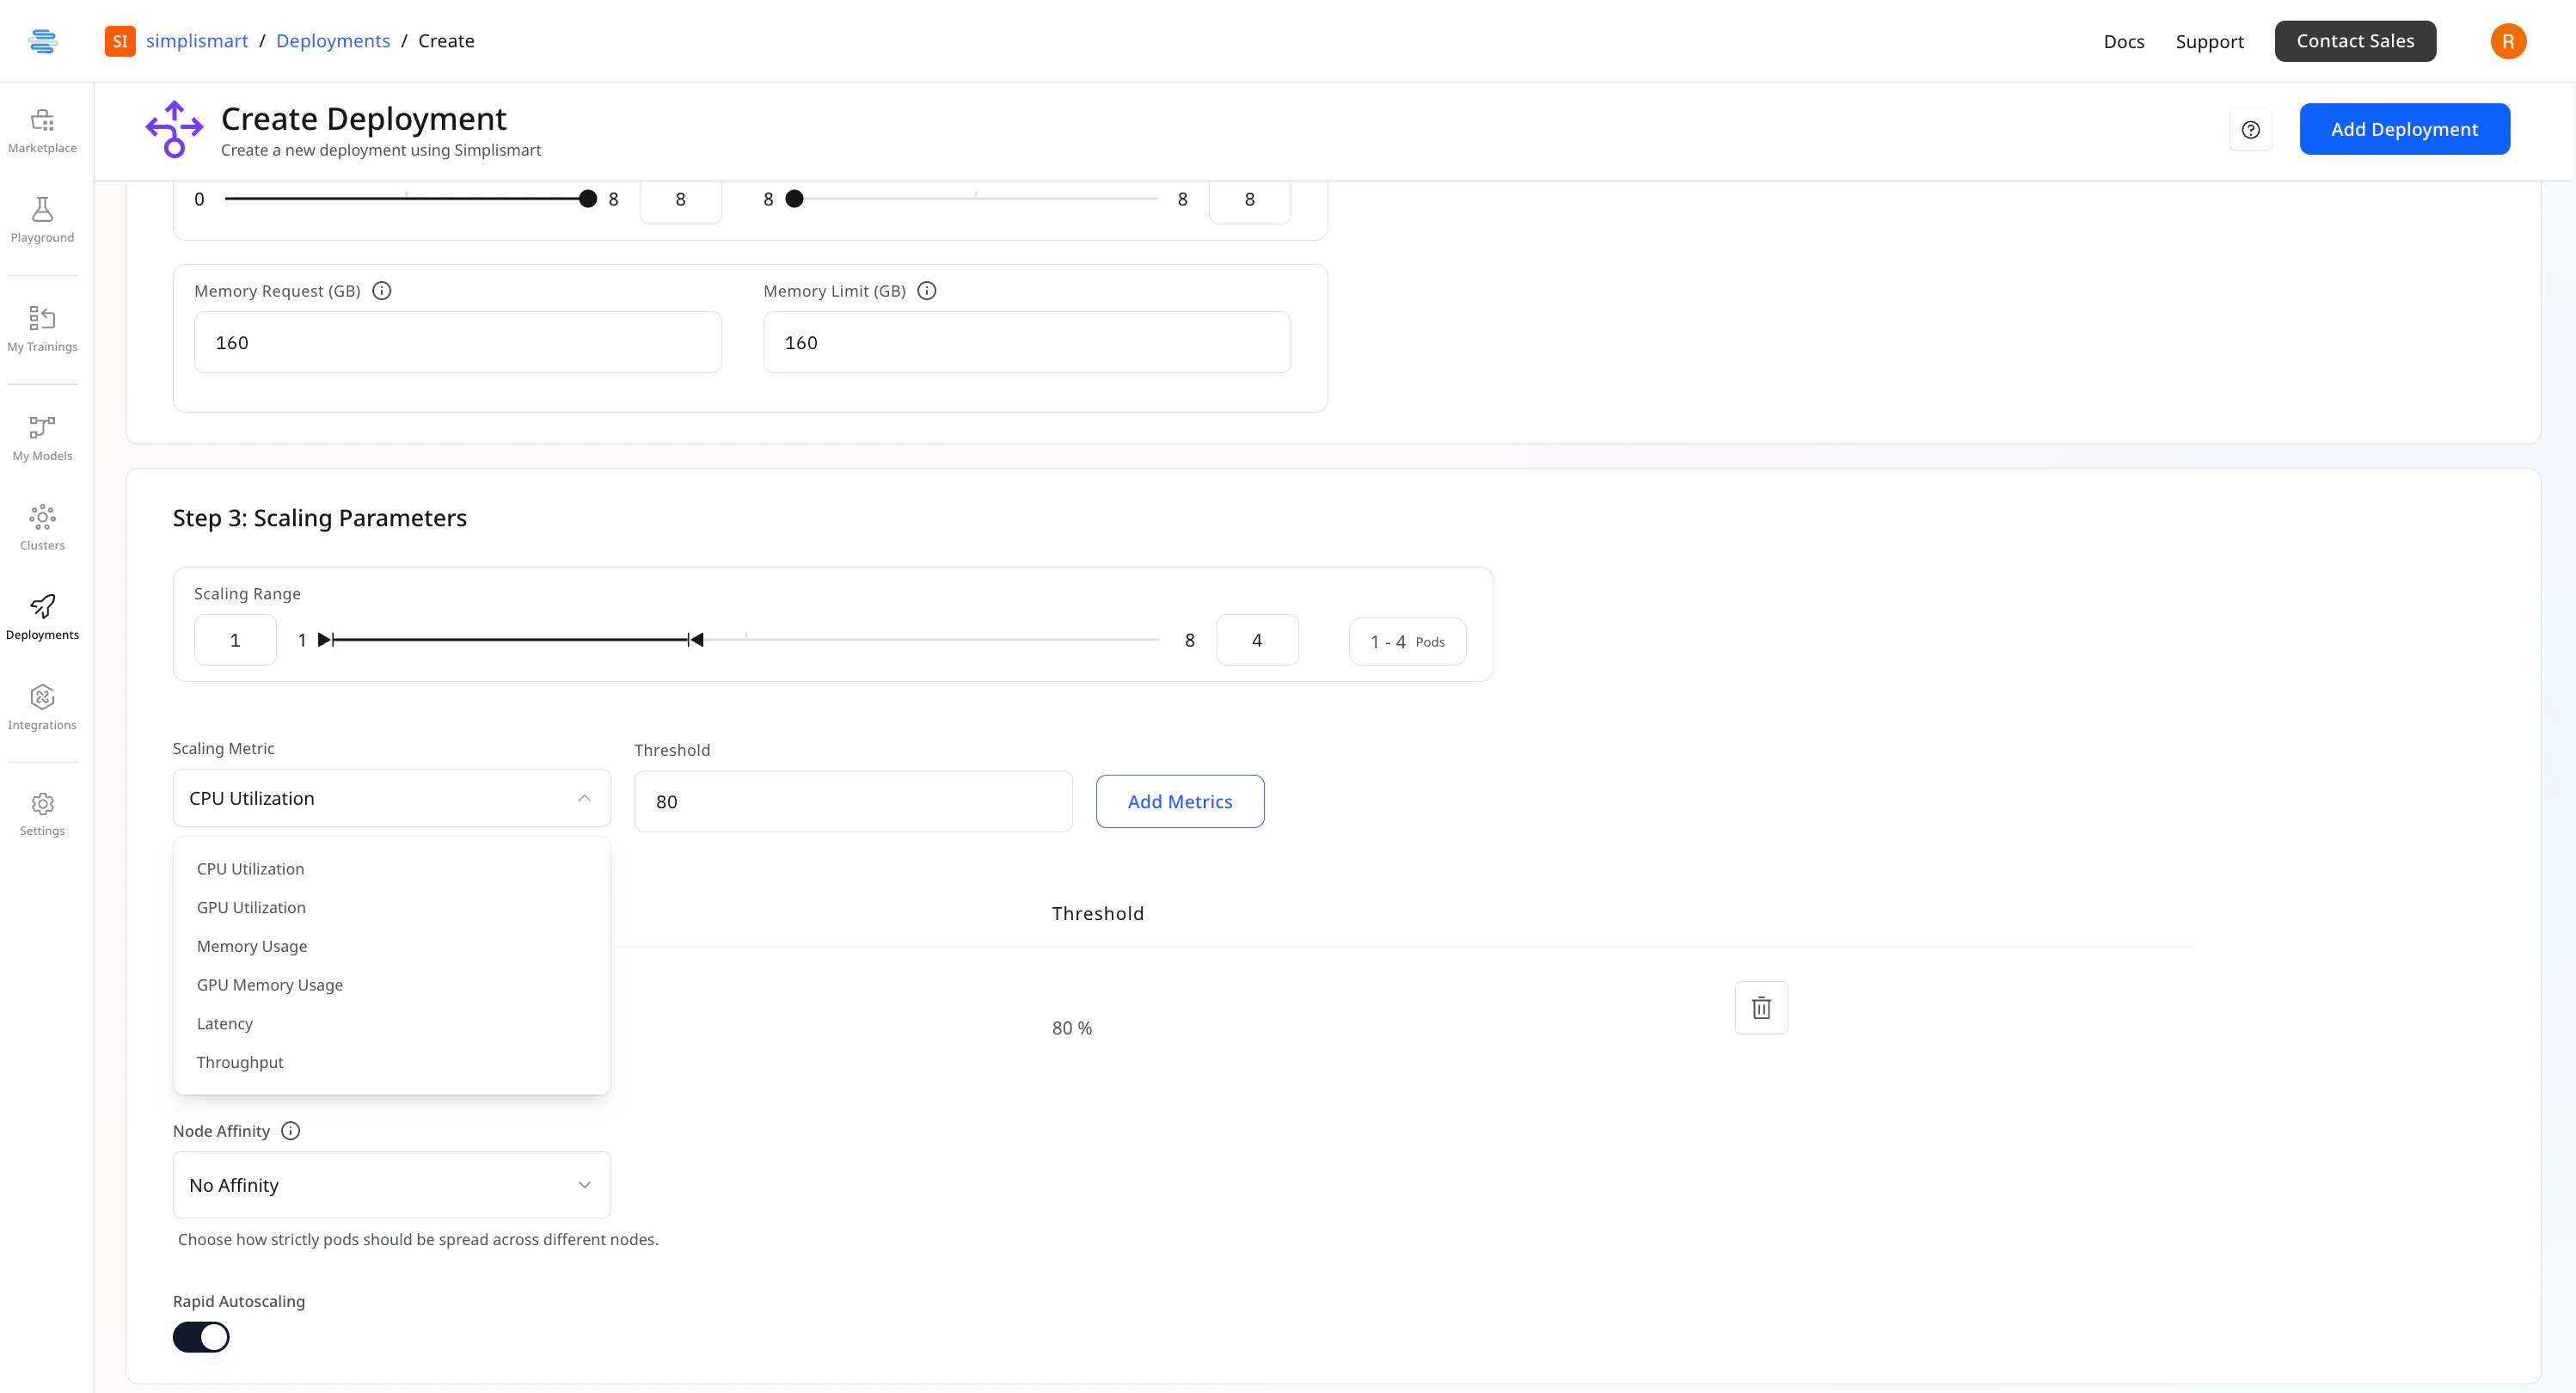 2. Set threshold values at which the deployment should scale.
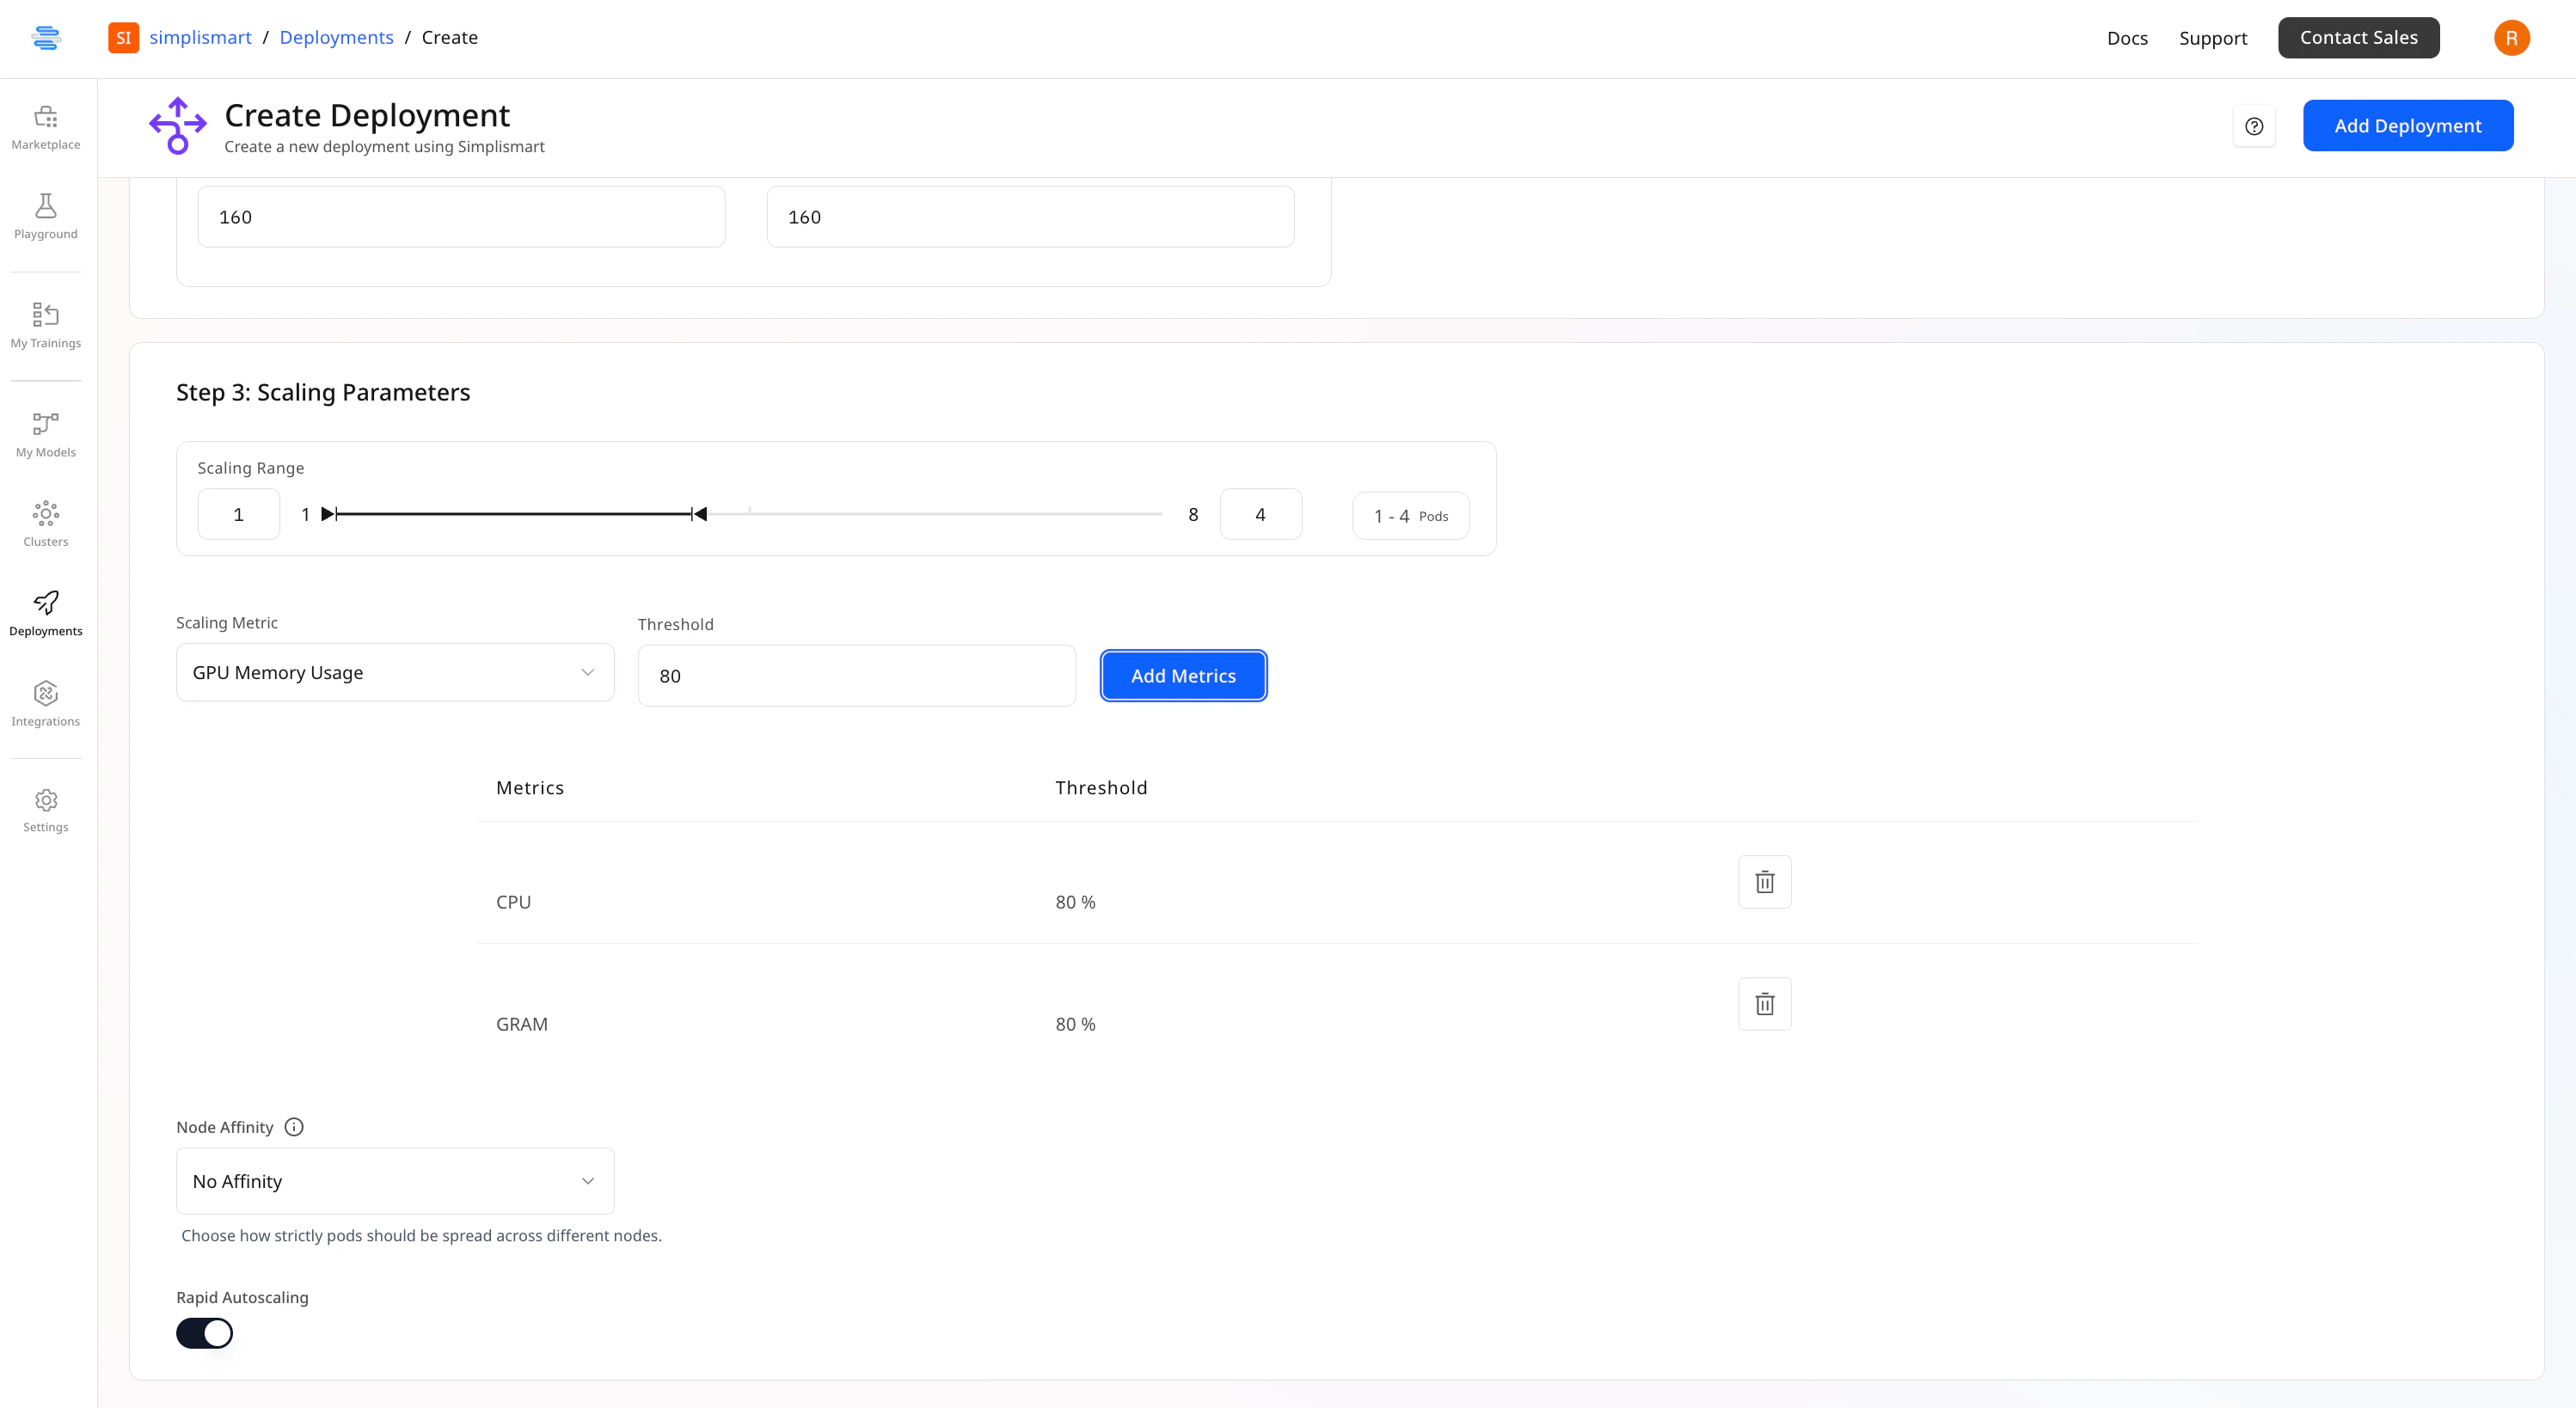 3. **Node Affinity (Optional)**\
Node affinity controls how pods are distributed across nodes within a cluster. This helps manage resource distribution and avoid overloading a single node.
* **No Affinity:** Pods are scheduled wherever resources are available. No placement preference is applied.
* **Preferred:** The scheduler will try to place pods on different nodes to improve distribution, but it's not enforced. If not possible, pods may still be placed on the same node.
* **Required:** Pods are strictly placed on different nodes. If a separate node isn’t available, the pod will remain in a pending state until the condition is met.
Example: With two nodes (8 GPUs each) and two pods (2 GPUs each), using Preferred will try to place each pod on a separate node. Using Required will force them onto separate nodes — even if one node could run both.
**Rapid Autoscaling**\
\
Enable this via the toggle at the bottom of the screen for faster scaling. Pods spin up in seconds or minutes based on the model.
### **Async Deployments (Additional Notes)**
For async mode, note the following changes-
* In **Processing Type**, select `Async`.
* Resource and scaling configurations remain similar.
3. **Node Affinity (Optional)**\
Node affinity controls how pods are distributed across nodes within a cluster. This helps manage resource distribution and avoid overloading a single node.
* **No Affinity:** Pods are scheduled wherever resources are available. No placement preference is applied.
* **Preferred:** The scheduler will try to place pods on different nodes to improve distribution, but it's not enforced. If not possible, pods may still be placed on the same node.
* **Required:** Pods are strictly placed on different nodes. If a separate node isn’t available, the pod will remain in a pending state until the condition is met.
Example: With two nodes (8 GPUs each) and two pods (2 GPUs each), using Preferred will try to place each pod on a separate node. Using Required will force them onto separate nodes — even if one node could run both.
**Rapid Autoscaling**\
\
Enable this via the toggle at the bottom of the screen for faster scaling. Pods spin up in seconds or minutes based on the model.
### **Async Deployments (Additional Notes)**
For async mode, note the following changes-
* In **Processing Type**, select `Async`.
* Resource and scaling configurations remain similar.
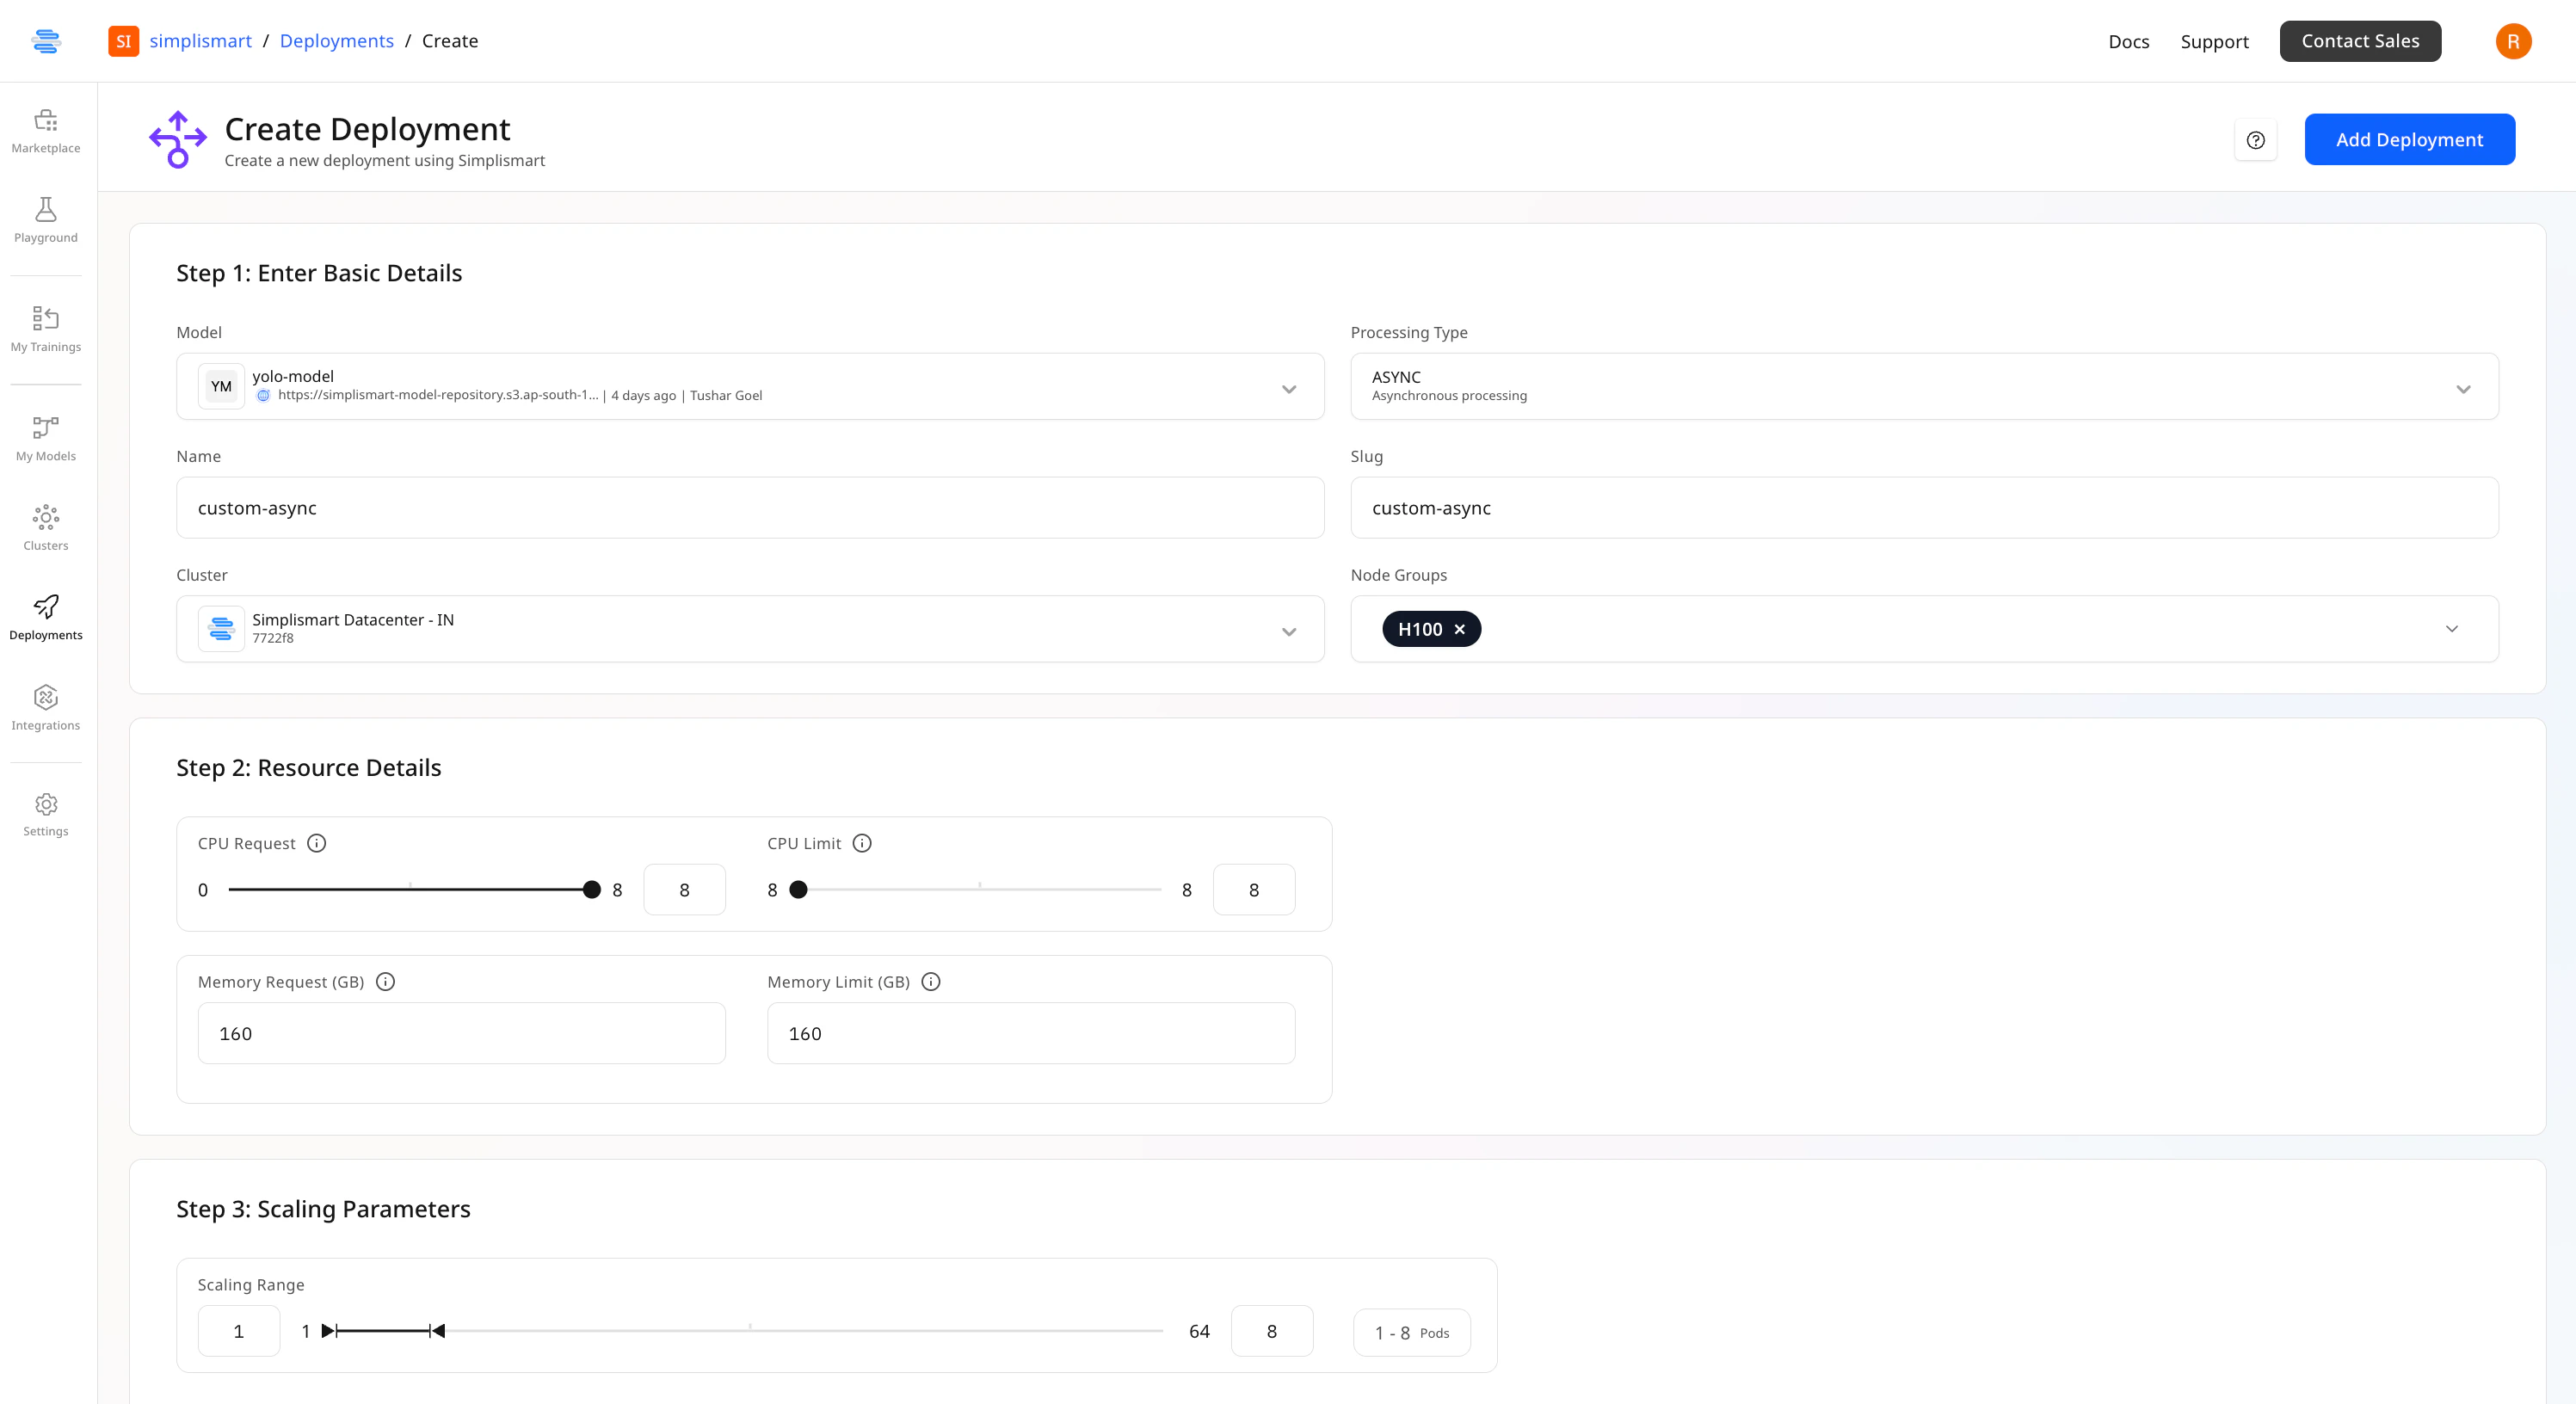 * An additional scaling parameter is available:
* **Queue Length**:\
Set the number of messages (requests) per pod.\
This helps scale based on the request queue per pod, depending on how many concurrent requests your model can handle.
* An additional scaling parameter is available:
* **Queue Length**:\
Set the number of messages (requests) per pod.\
This helps scale based on the request queue per pod, depending on how many concurrent requests your model can handle.
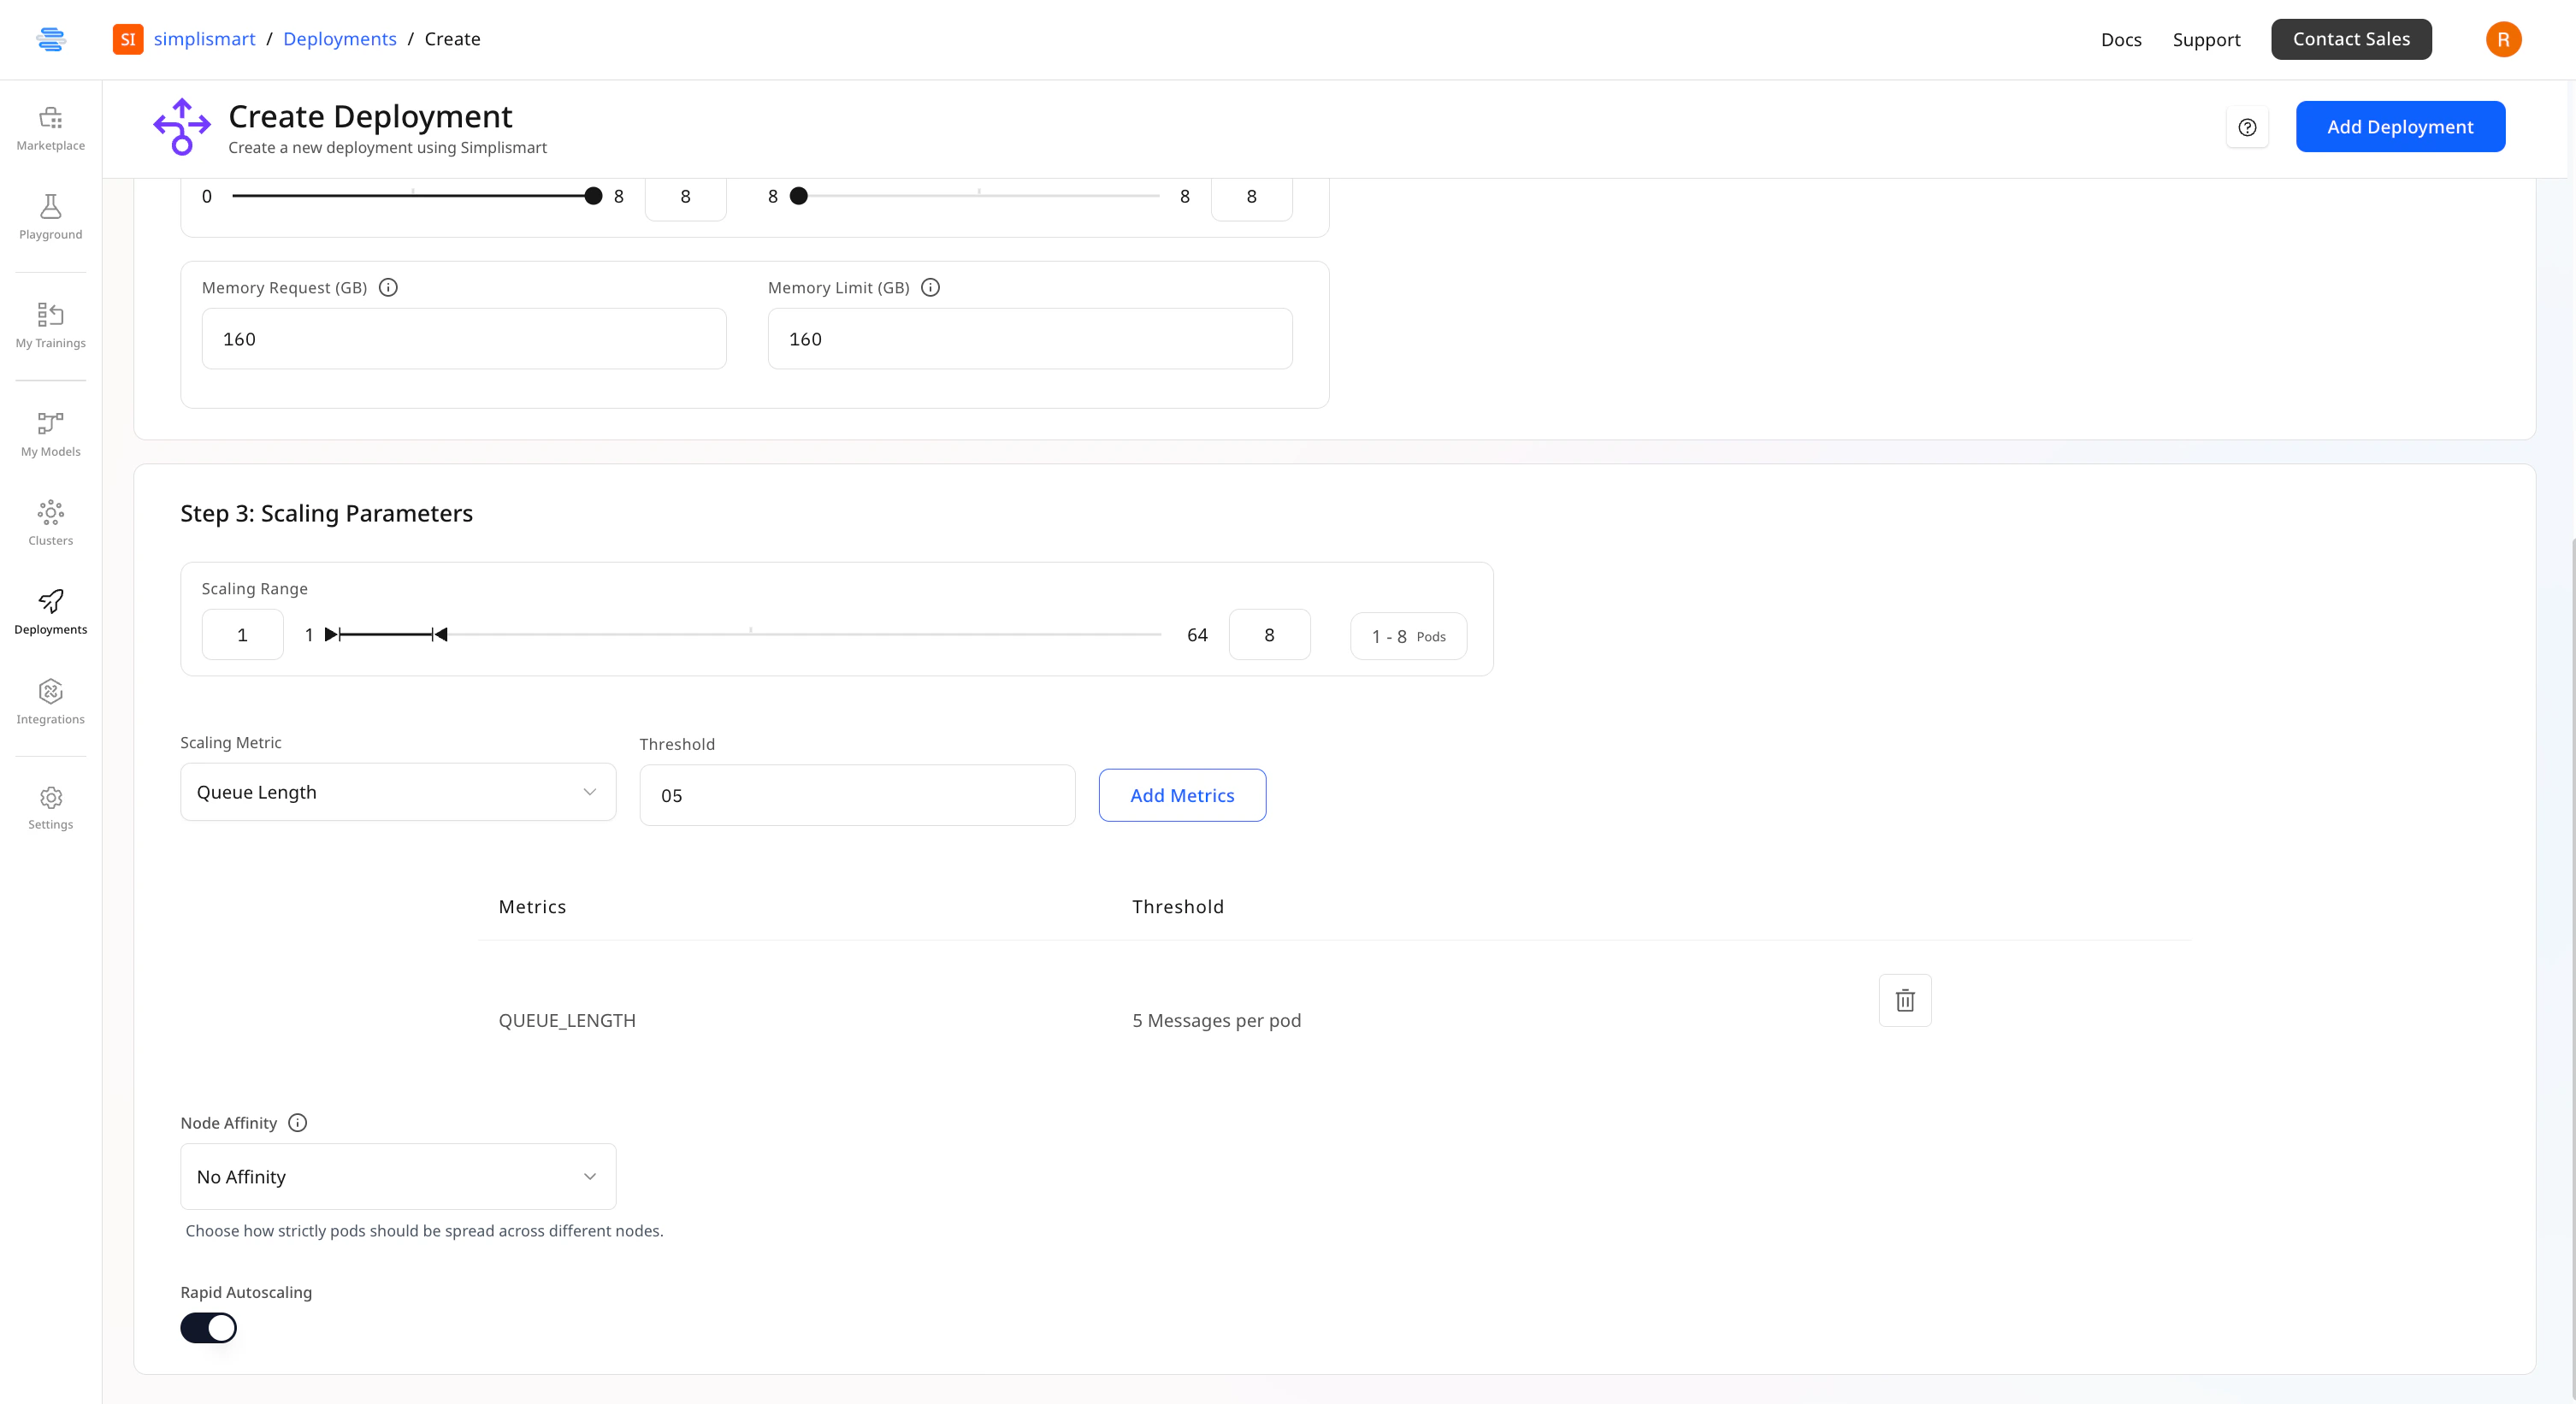 After filling in all the fields, click **Add Deployment** to start the deployment process.