

Prerequisites
- Docker images uploaded to your Docker Hub repository.
- Docker Hub account with appropriate access permissions:
Important: Ensure your Docker Hub credentials have read access to your repositories.
Part 1: Setting Up Docker Hub Credentials
Creating a Secret:
- Navigate to the Integrations section in your Shakti Studio dashboard
- Select Secrets from the menu
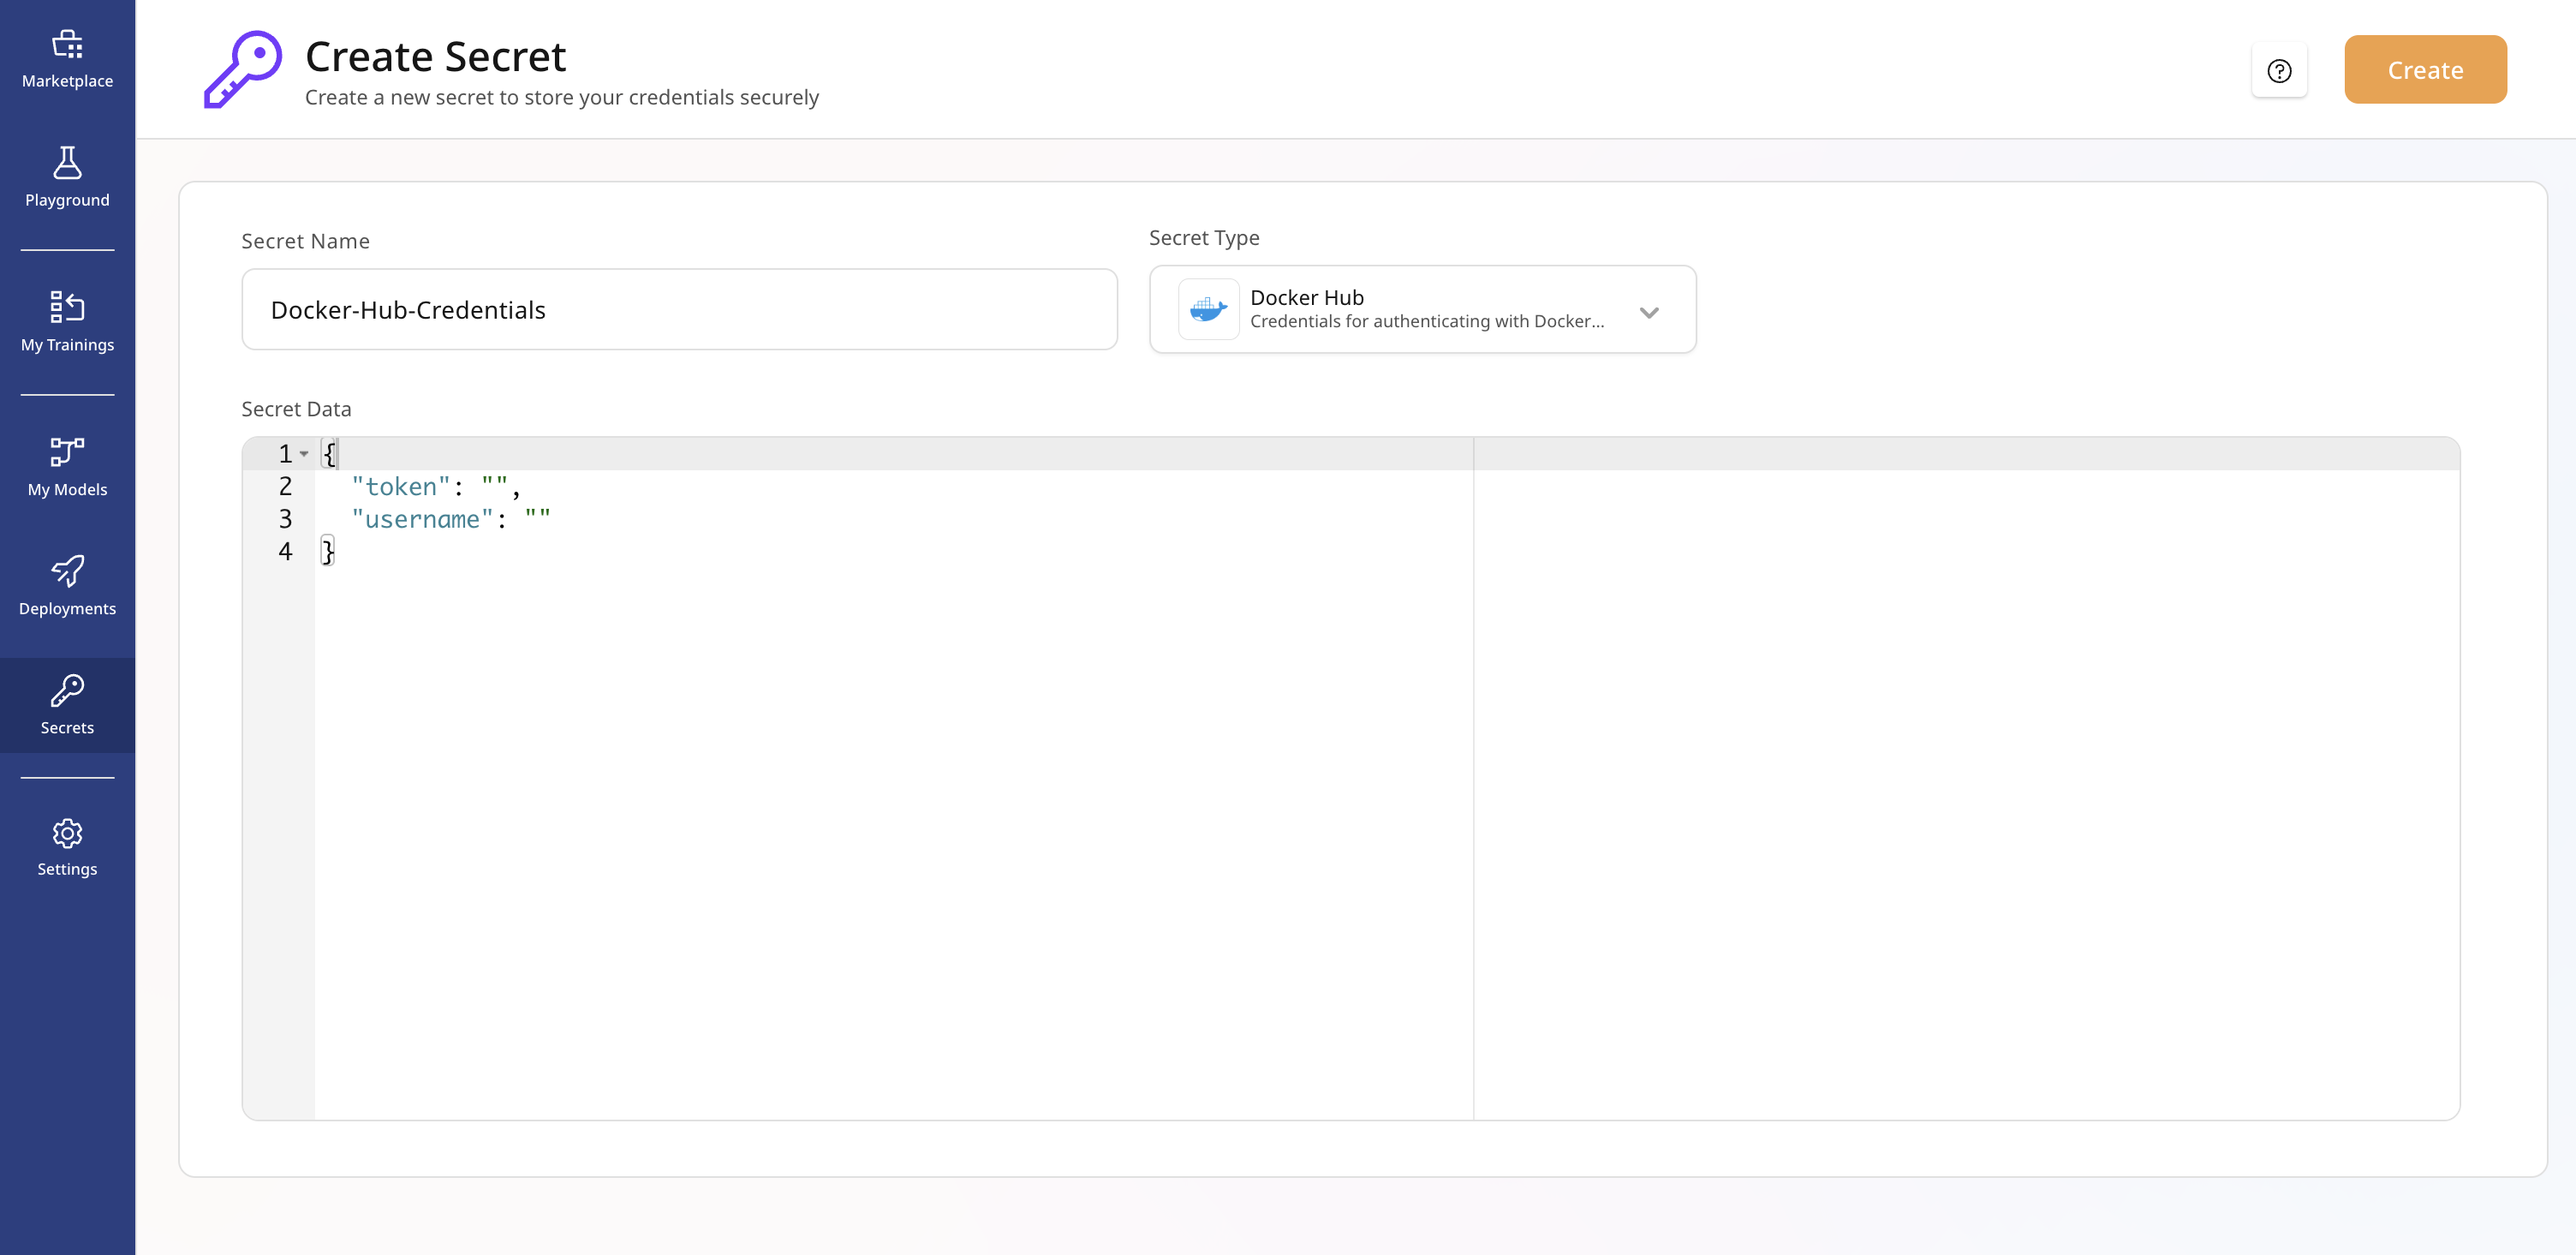
- Click Create Secret and configure:
- Secret Name: Enter a name for your secret.
- Secret Type: Select Docker Hub from the dropdown.
- Credentials: Enter your Docker Hub username and access token.
Part 2: Adding Your Docker Image
Model Configuration
- Go to the My Models page
- Click Add Model and provide:
- Model Name: Descriptive name for your application
- Source: Select the model source as DockerHub from the dropdown
- Registry Path: Your Docker Hub registry path
- Image Tag: Specify the image version/ tag
- GPU Per Container: Default is set to
1. You can allocate maximum 8 GPUs. - Credentials: Select the Docker Hub secret created earlier
- The system will verify your image path and add it to your models list

Part 3: Deployment Configuration
Basic Setup
- From the My Models section, select the previously added model and click on Deploy Model
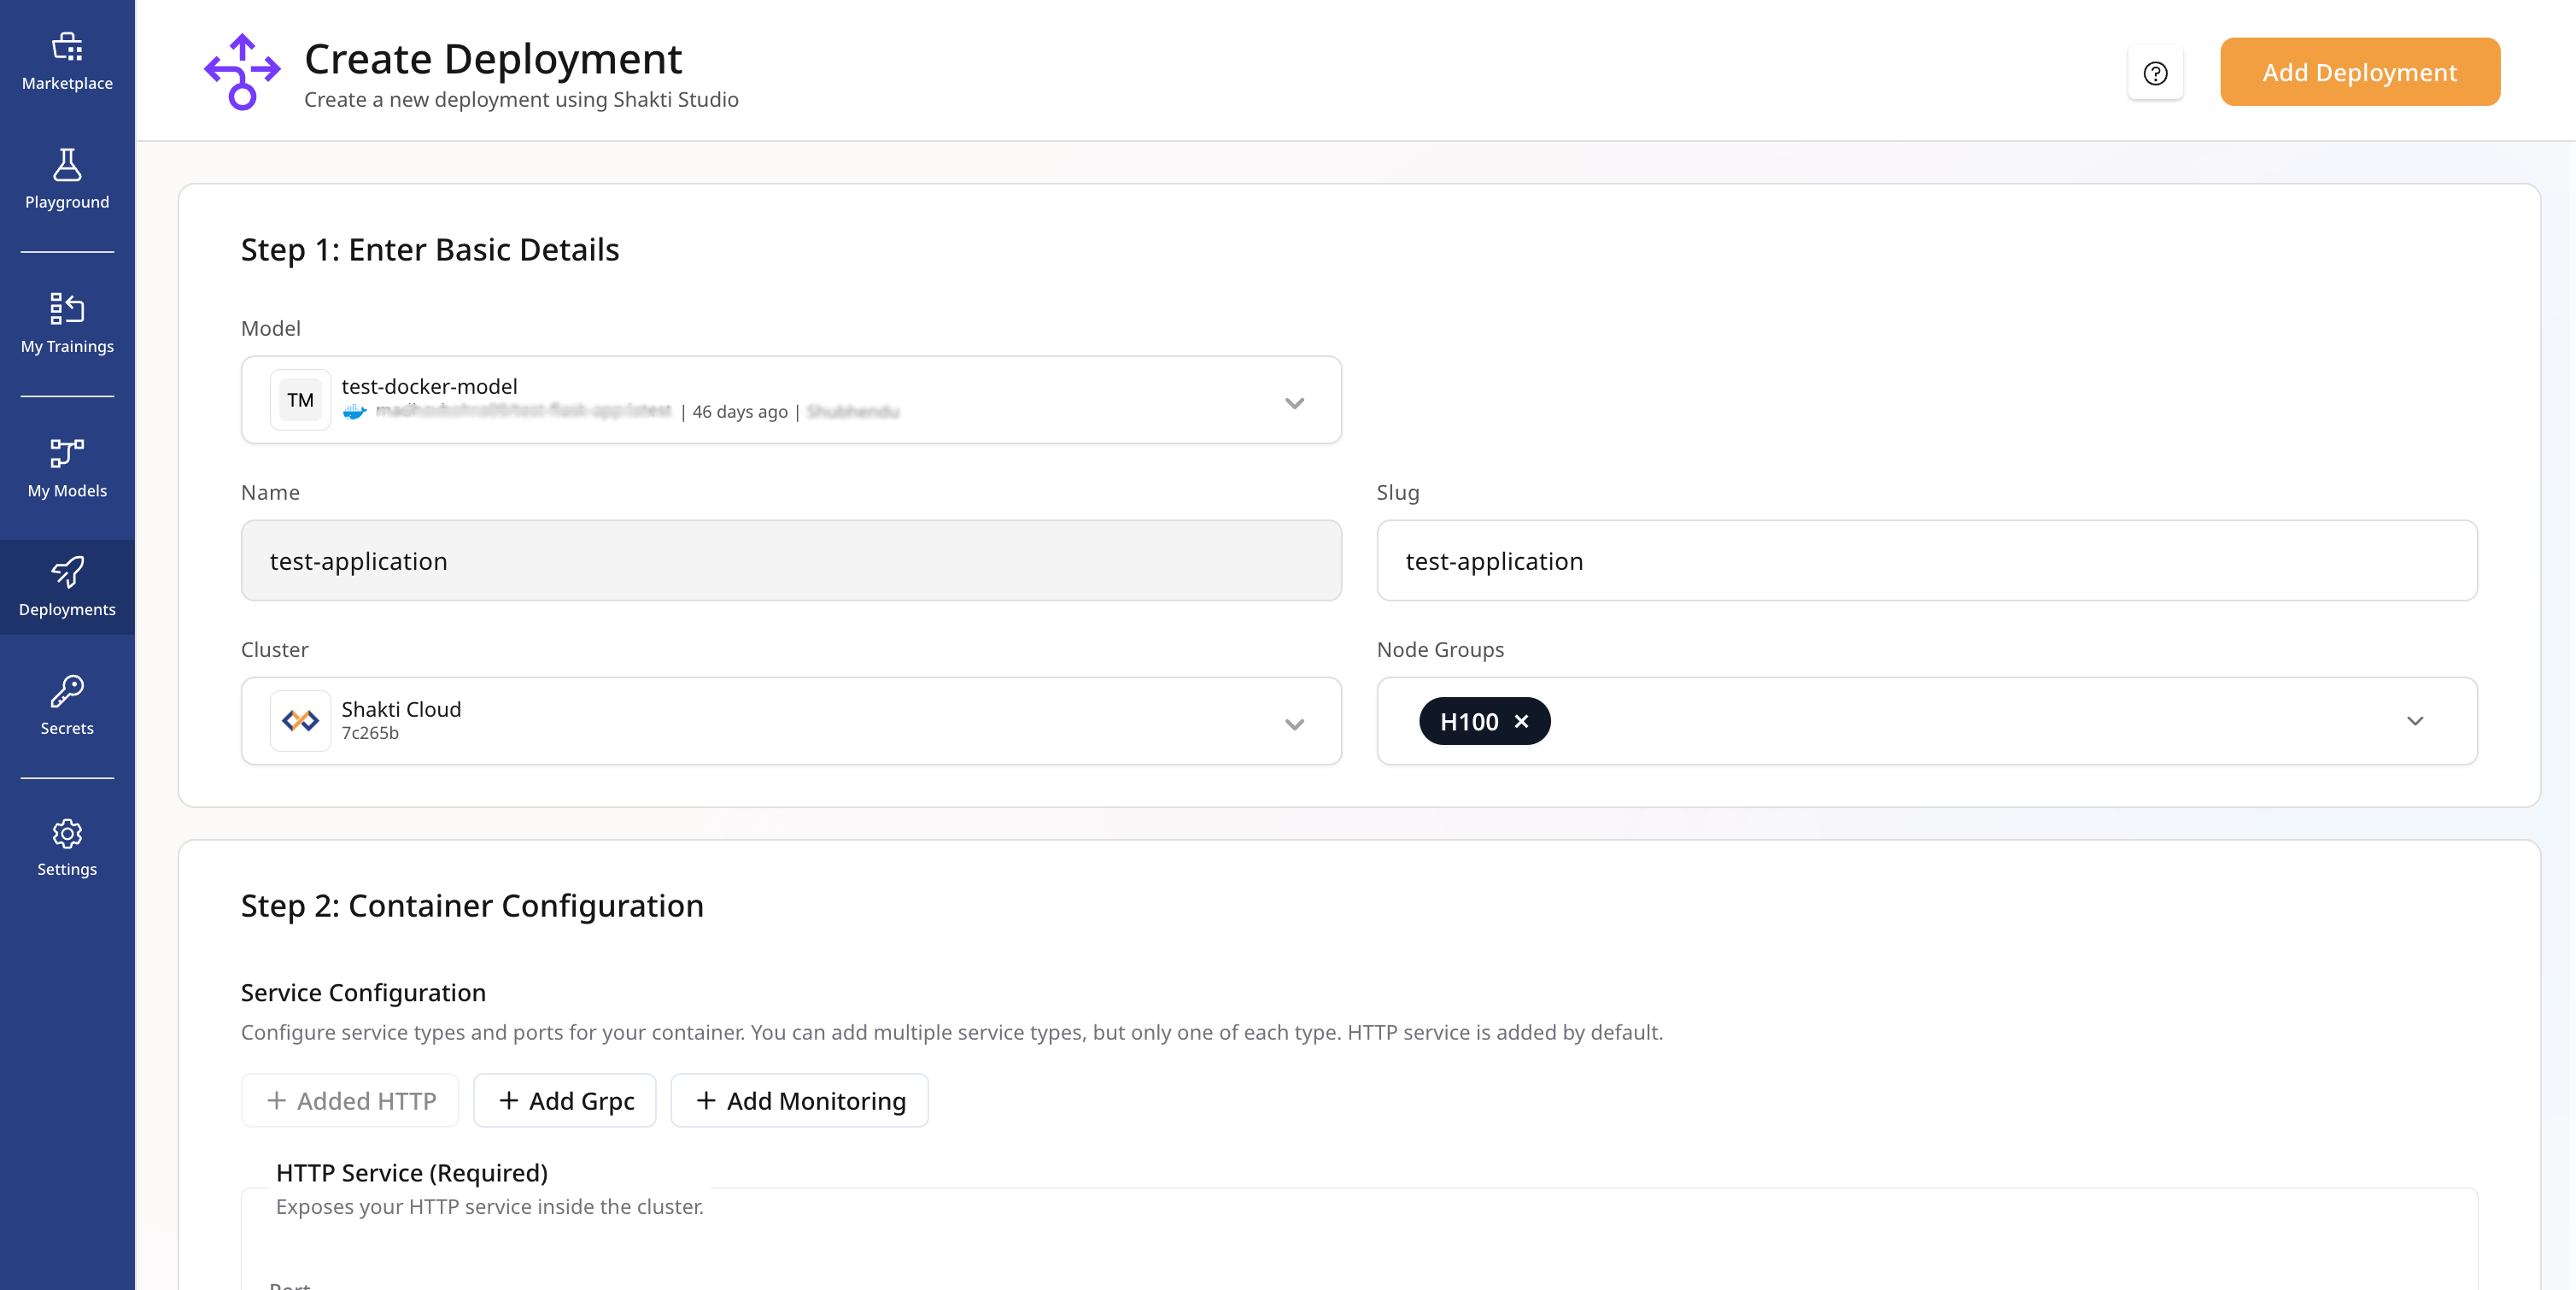
- Configure basic details:
- Deployment Name: Enter a unique name for this deployment.
- Cluster: Select Shakti Cloud as the cluster.
- Node Group: Choose the required node group (H100/L40S).
Container Configuration
Service Configuration
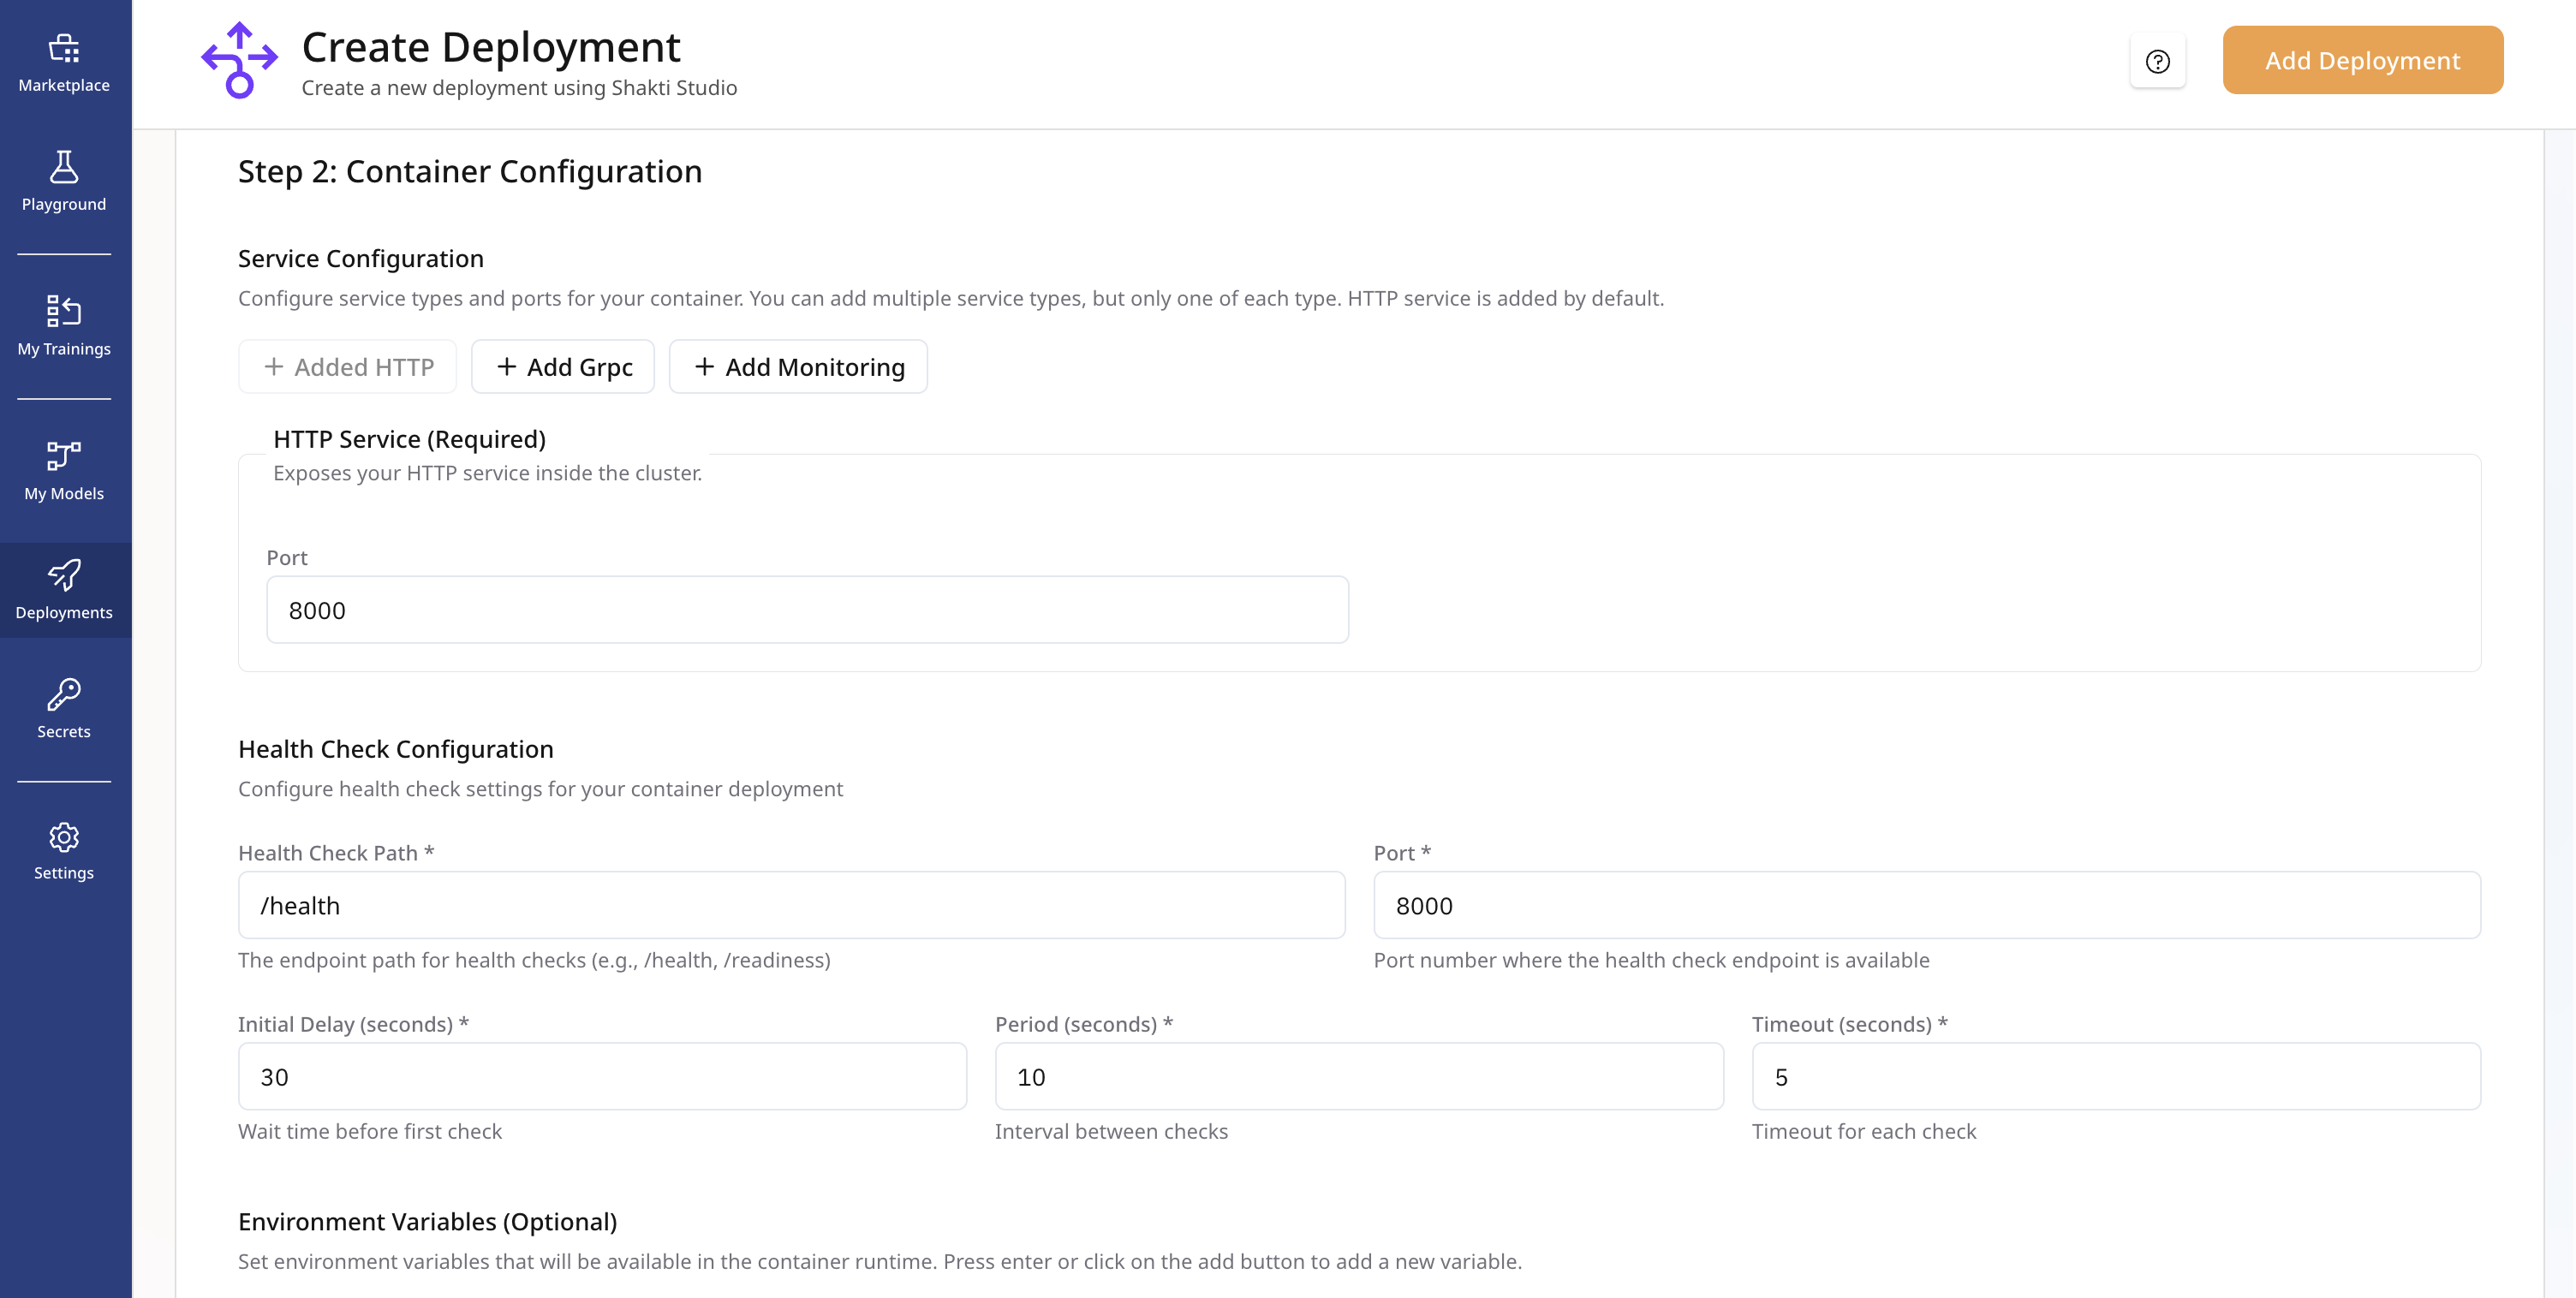
Configure how external traffic reaches your container:- HTTP Service (Required):
- For example: 8000 (or your application’s port) (The port on which your server will be running).
- This exposes your service within the cluster.
- Optional Services:
- gRPC Service: Enable if your application uses gRPC. (This port can’t be the same as http service port)
- Monitoring Service: Add for enhanced monitoring capabilities.
Health Check Settings
Essential for monitoring container health:- Health Check Path: /health (endpoint your app responds to)
- Port: 8000 (same as your HTTP service port)
- Initial Delay: 30 seconds (startup time allowance)
- Check Interval: 10 seconds (frequency of health checks)
- Timeout: 5 seconds (maximum response wait time)
Environment Variables (Optional)
Set runtime environment variables as needed:- Add key-value pairs for configuration
- Use the + button to add multiple variables
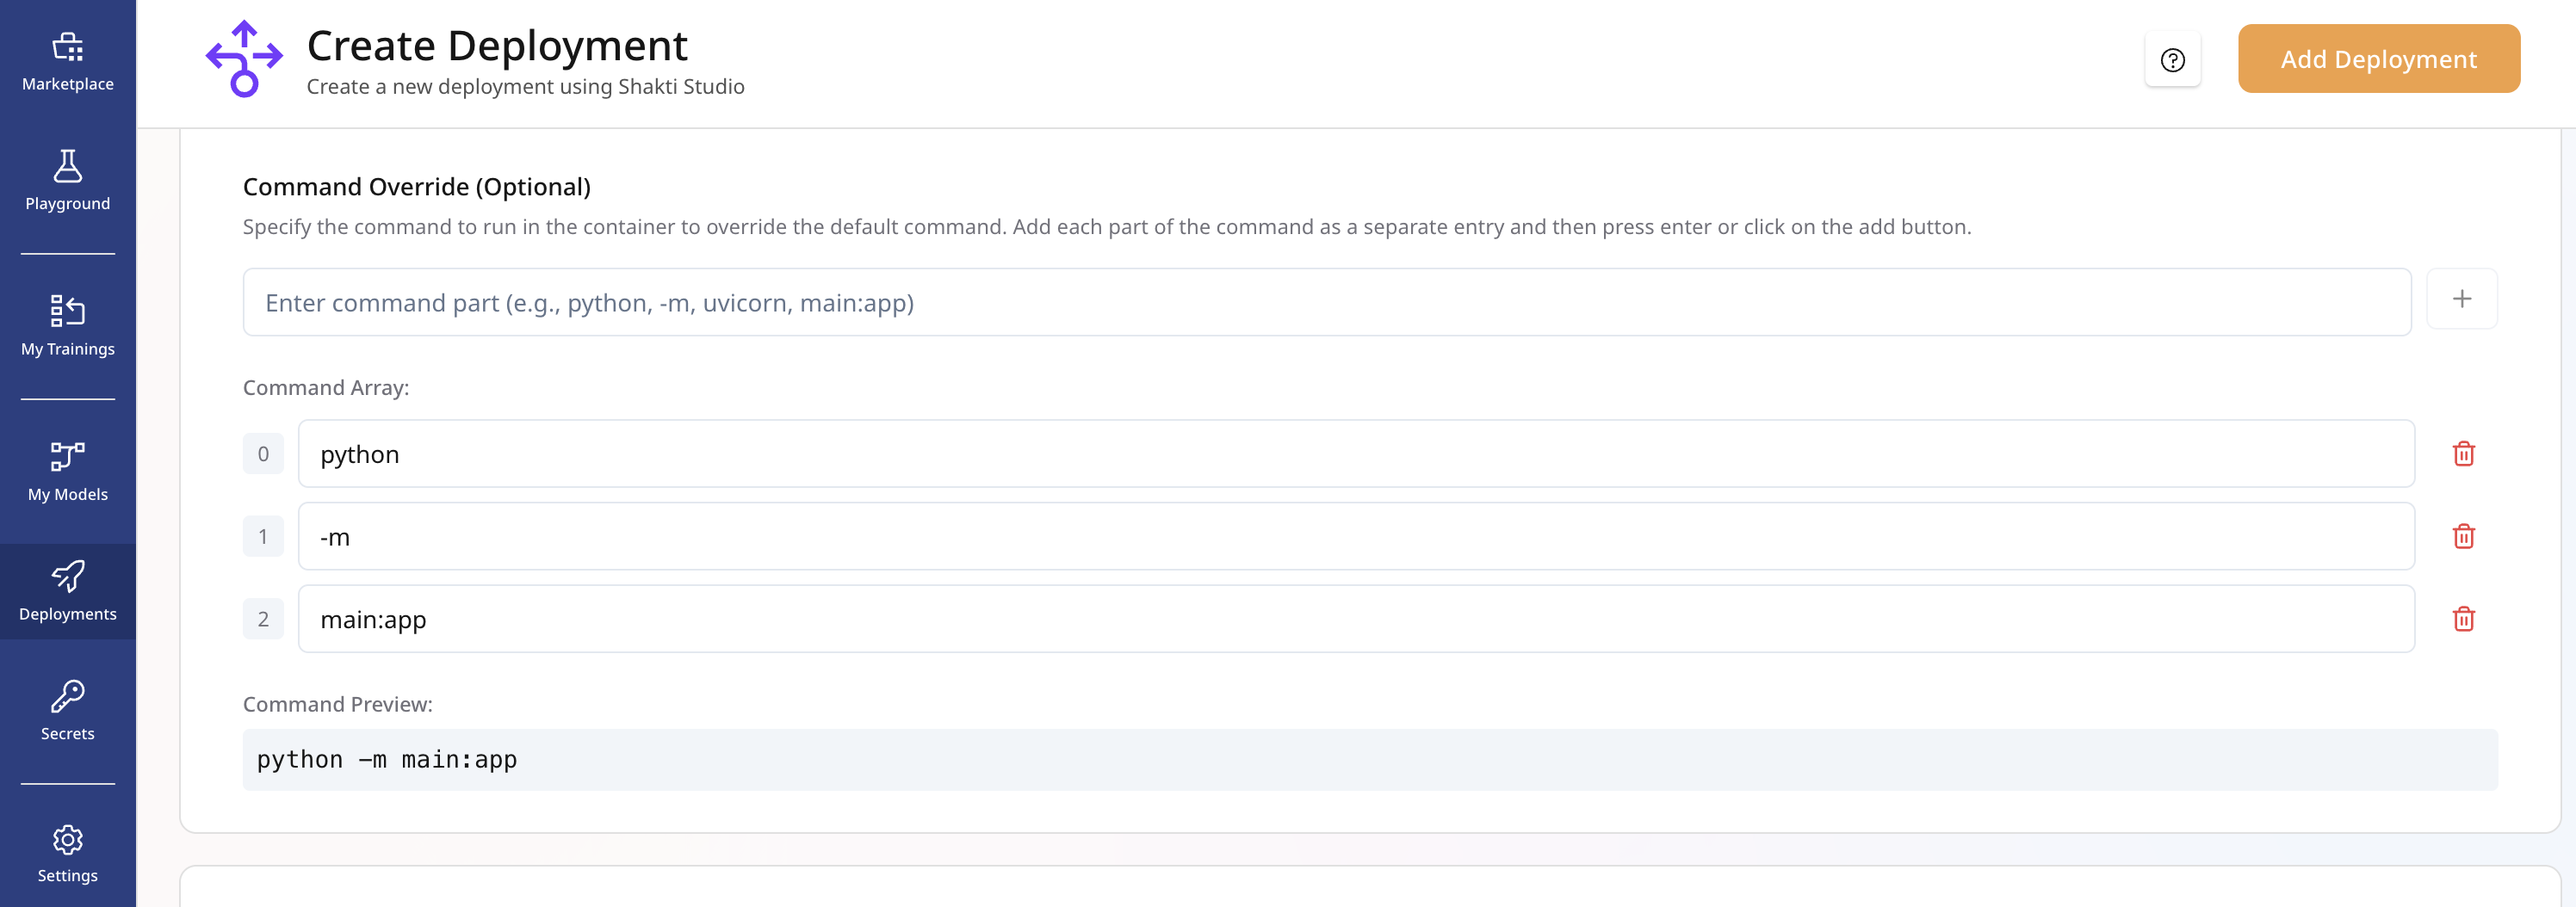
Command Override (Optional)
Override the default container startup command:- Specify the command to run in the container to override the default command. Add each part of the command as a separate entry and then press enter or click on the add button.
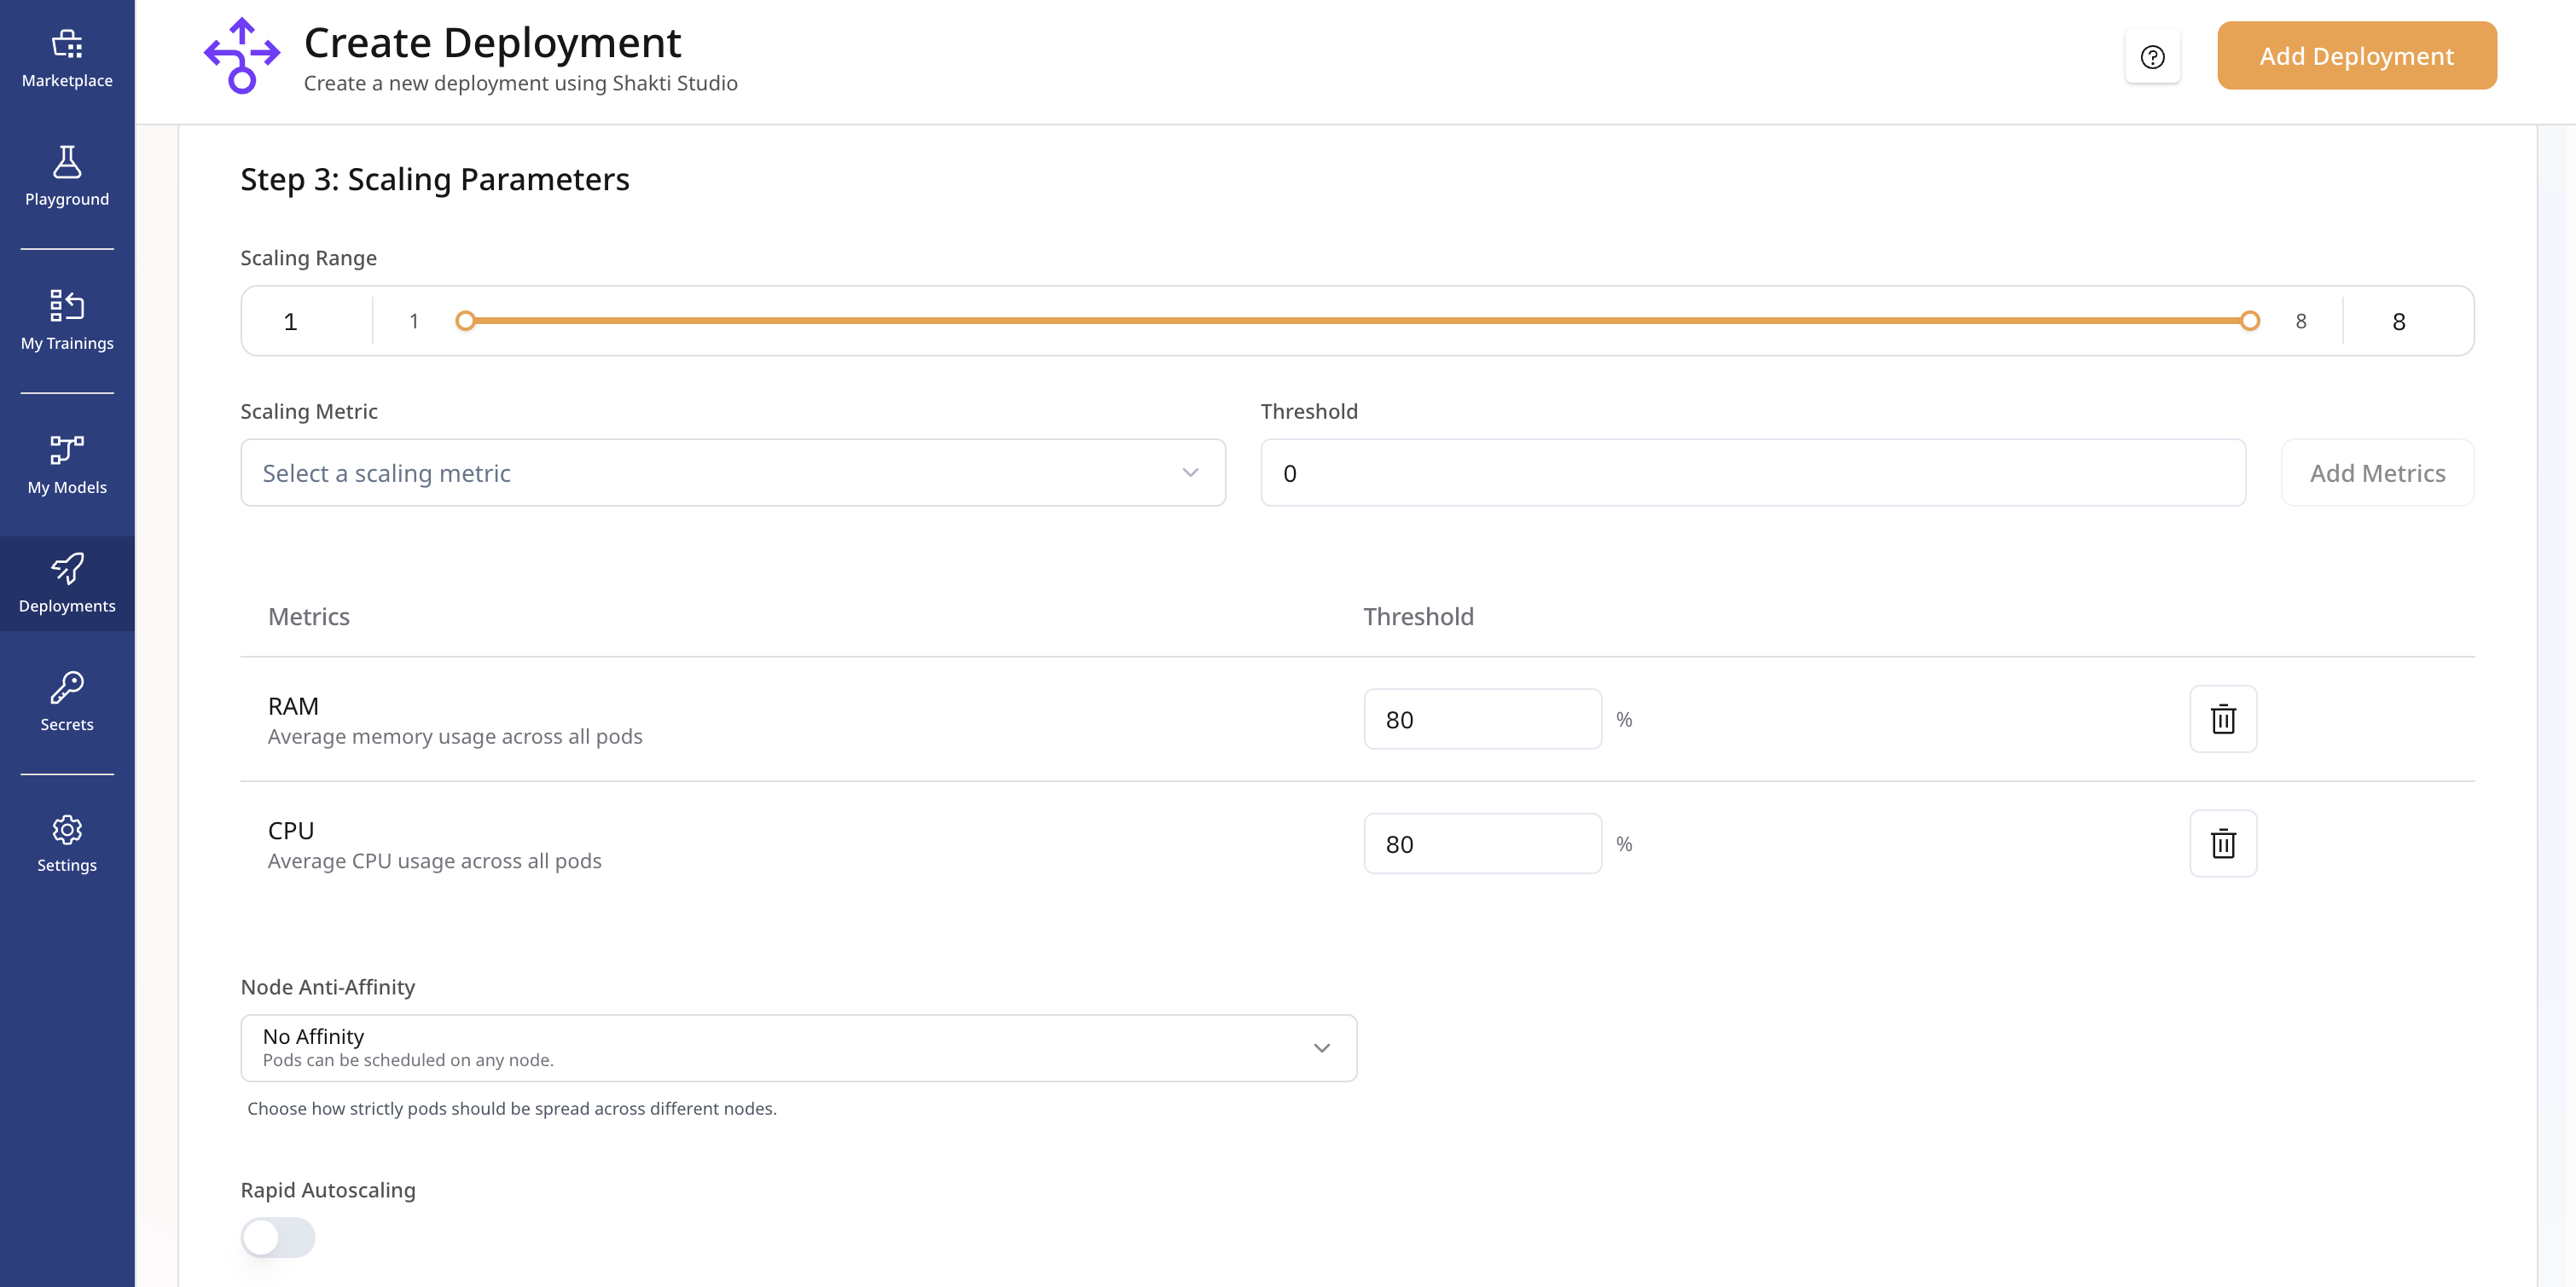
Scaling Parameters
- Range: Set minimum and maximum instances (1-8)
- Scaling Metric: Choose CPU usage / memory usage as the scaling trigger
- Threshold: Define the percentage that triggers scaling
(e.g CPU Utilisation 80%)
Node Distribution (Node Anti-Affinity)
Control how your containers are distributed across nodes:- No Affinity: Containers deployed anywhere resources are available
- Preferred: System attempts to distribute across different nodes when possible
- Required: Strict enforcement of separate node placement
Advanced Options
- Rapid Auto-scaling: Enable for faster scaling response when needed
Part 4: Deployment
- Review all configuration settings
- Click Add Deployment to initiate the deployment process
- Monitor the deployment status
Part 5: Monitoring and Access
Health Status
Once deployed successfully, you’ll see:- Health Status: Healthy indicator on the deployment page
- Deployment URL: Direct access link to your application
Troubleshooting
- Verify the health check endpoint is properly implemented in your application
- Ensure Docker image is accessible with the provided credentials
- Confirm port configuration matches your application